Dips
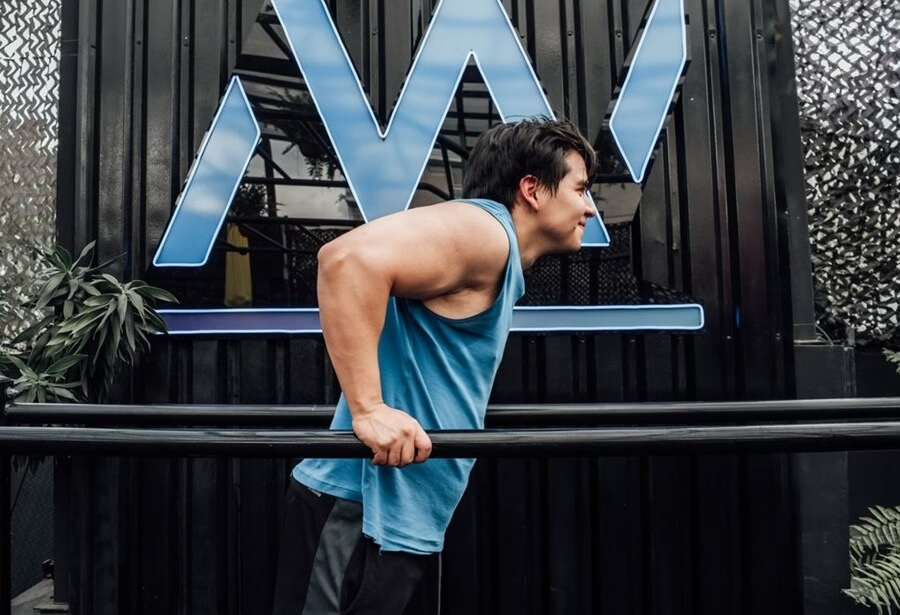
Dips are one of the most effective, foundational bodyweight exercises you can perform to develop upper-body power.
Much like chin-ups and pull-ups, they require you to manipulate your entire body weight through free space.
By suspending your frame between parallel bars, you force your upper-body muscles to work together to manage your descent and drive you back to the starting position.
The foundational mechanics of the movement are simple: you bend your elbows to lower your body under control, and then press through your palms to straighten your arms and return to the peak. However, executing this movement with good form requires a deep understanding of structural alignment and joint safety.
Because managing your full body weight requires tremendous foundational strength, many lifters choose to start with the assisted dip machine variation until they develop the necessary pushing power to conquer the free parallel bars.
Header image: Pexels
What Muscles Do Dips Use?
While many lifters view the dip purely as an arm exercise, it is a highly functional compound lift that recruits several major muscle groups across your upper frame.
Dips are a great exercise for the upper body, using mainly the triceps. However this also works the shoulders, chest and upper back:
- Triceps Brachii: Operating as the primary mover, the back of your arms carries the brunt of the load to extend your elbows at the top of each rep.
- Pectoralis Major: Your chest muscles, particularly the lower, sternal fibers, are challenged to push your body upward.
- Anterior Deltoids: The front of your shoulders provides structural stability to protect the joint throughout the movement.
- Upper Back & Core: Your trapezius, rhomboids and abdominal wall have to lock your torso in place and prevent your legs from swinging.
Because of this intense multi-joint recruitment, the bodyweight dip serves as the perfect accessory exercise to supplement your heavy barbell compound lifts, such as the deadlift and bench press.
The Benefits of Bodyweight Dips
Integrating standard dips into your weekly strength training routine offers significant training advantages:
- Superior Hypertrophy: Dips stretch the target muscles under a heavy load, making them an unparalleled tool for building rapid size and dense muscle definition in the arms and chest.
- Functional Pushing Power: Moving your own body weight through a free plane of motion builds real-world, functional strength that fixed-path gym machines cannot replicate.
- Adjustable Muscle Focus: By making simple, deliberate tweaks to your hand placement and torso angle, you can instantly shift the training emphasis between your chest and your triceps.
- High Versatility: While parallel bars are ideal, the fundamental mechanics can easily be performed using household furniture or outdoor platforms, making it an excellent exercise for home workouts.
Grip and Hand Placement for Dips
Before you mount the bars, your hand placement dictates the entire trajectory of the lift. Altering your grip allows you to target different developmental benefits.
A narrow grip forces your elbows to tuck close to your ribs, placing an isolated emphasis directly onto the triceps. Conversely, moving your hands out to a wider grip flares the elbows slightly, shifting the primary workload onto the pectoralis major muscles.
Varying your grip across different training blocks is a fantastic strategy to ensure well-rounded upper-body development.
Body Alignment & Position for Free Dips
Unlike machine variations that anchor your lower body, a free-hanging bodyweight dip requires total body control. Your entire body is suspended in mid-air, meaning your core must actively dictate your center of gravity.
To set up a perfect, stable starting position:
- The Mount: Hoist yourself up onto the parallel bars with your arms locked out. Immediately pack your shoulders down away from your ears; do not let your head sink into your collarbones.
- The Core Anchor: Brace your abdominals tightly as if preparing for a plank. Cross your ankles behind you and bend your knees slightly. This locks your lower body into a solid unit, preventing your legs from swinging like a pendulum during the set.
- The Head Position: Keep your neck neutral and your eyes focused forward or slightly down. Do not look up at the ceiling or tuck your chin hard against your chest, as this disrupts spinal alignment.
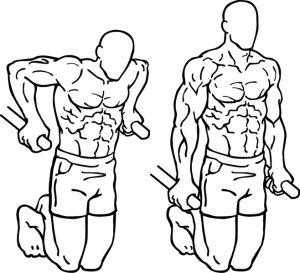
Dips exercise illustration by Everkinetic at English Wikipedia [CC BY-SA 3.0], via Wikimedia Commons
How to Perform the Bodyweight Dip
Because you are moving your own mass through free space, your torso angle dictates exactly which muscles do the heavy lifting. You must maintain deliberate, slow control over both phases of the movement.
1. The Angle-Driven Descent
Inhale deeply and begin lowering yourself by bending your elbows. As you descend, you must intentionally lean your torso slightly forward at roughly a 10-to-15-degree angle.
This slight forward lean is crucial for balance. If you try to stay perfectly vertical without a machine platform underneath you, you will place extreme, unhealthy shear stress on the front of your shoulder joints.
Control your speed. Take a full two seconds to reach the bottom. Lower yourself until the crease of your elbow hits a 90-degree angle, or until your upper arms sit parallel to the floor.
Keeping your elbows pointing straight backward rather than letting them flare outward ensures the workload stays distributed between your lower chest and triceps.
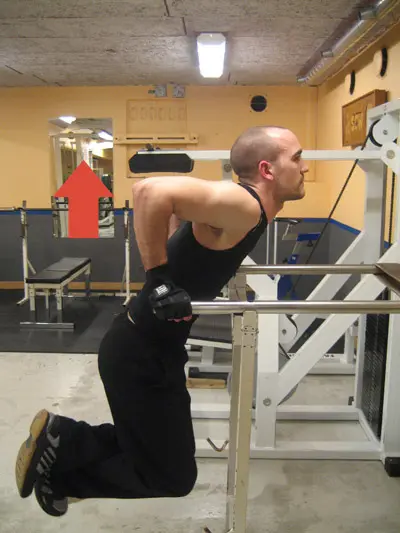
Dips descent by Ulf Liljankoski via Flickr [CC BY-ND 2.0]
2. The Stabilised Ascent
Pause for a fraction of a second at the bottom, then exhale forcefully as you press down through the heels of your palms to drive your body back up.
Because there are no guide rails or machine tracks to keep you straight, you must focus on pressing evenly with both arms. Control your upward momentum so your body moves smoothly in a slight diagonal path, mimicking the exact angle of your descent.
Drive all the way to the top of the bars, squeezing your triceps hard at the peak of the rep. Stop just short of completely locking out your elbow joints to maintain constant muscular tension.
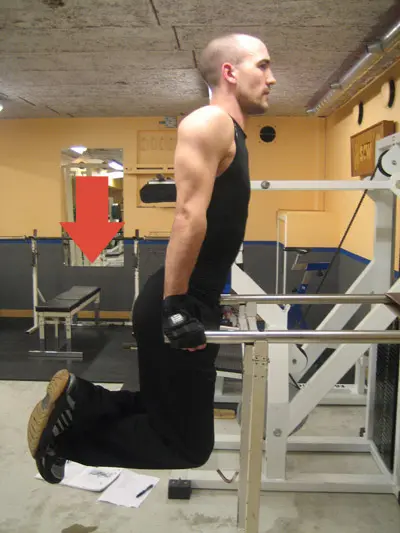
Dips ascent by Ulf Liljankoski via Flickr [CC BY-ND 2.0]
The Dipping Progression
Because the bodyweight dip demands tremendous upper-body strength, jumping straight onto the parallel bars can be incredibly difficult for beginners.
To build the necessary foundational power safely without compromising your shoulder joints, it helps to follow a structured progression path:
- Level 1: The Machine Assisted Dip – If you cannot manage a single clean bodyweight rep, start here. By using the assisted dip machine, you can dial in your elbow positioning and build pressing power while the counterweight system handles a portion of your weight. As you get stronger, gradually decrease the assistance.
- Level 2: The Bench or Seated Dip – An excellent home alternative that allows your legs to support a percentage of your body weight while you master the basic pressing mechanics.
- Level 3: The Parallel Bar Dip – Once your strength allows you to handle your full body weight with good technique including arms at 90-degrees parallel to the floor, you are ready for standard bar work.
- Level 4: Advanced Variations – For experienced lifters looking to push past a strength plateau by adding extra resistance or instability.
Types of Dips
There are various types of dip and different ways of making dips harder or easier depending on the strength of the exerciser and the equipment available. Here are some ideas for creating an interesting and challenging dips workout:
Using Gymnastic Rings for Dips
When performing dips you can use gymnastic rings to make the exercise harder. Gymnastic rings are very unstable so you will have to concentrate on keeping the rings close together throughout the exercise.
This uses more muscle groups in order to stabilise the movement. This exercise forces your stomach (abdominals), back (traps and lats) and particularly your shoulders (deltoids) to work hard to keep your motion stable in an up and down movement and stop you from falling down between the rings.
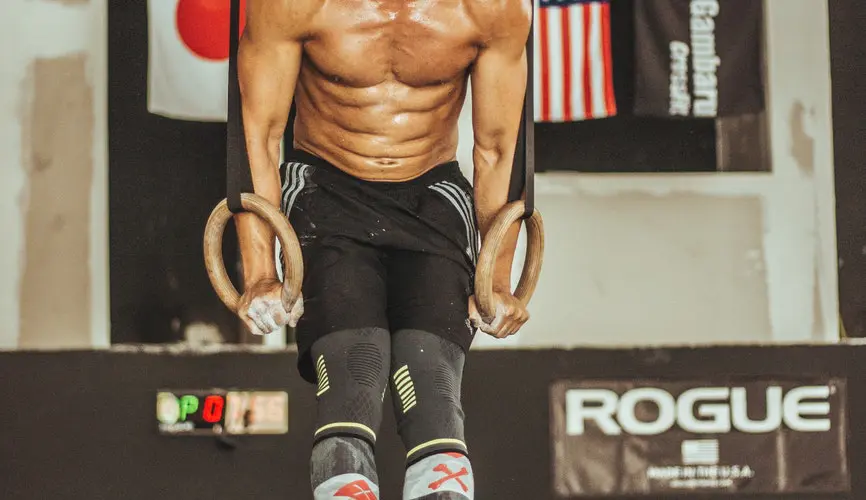
Dips with gymnastic rings. Image sourced via Unsplash
Using a Dipping Belt
Another type of dip is the dip with dipping belt. You can use this method to add weights to make dips harder. To use a dipping belt, you add weight plates to a special belt designed for this exercise. This belt is then tied around your waist while you perform the exercise.
The use of the dipping belt simply increases the weight you have to lift in each rep. In effect, this works to increase your body weight for the duration of the exercise.
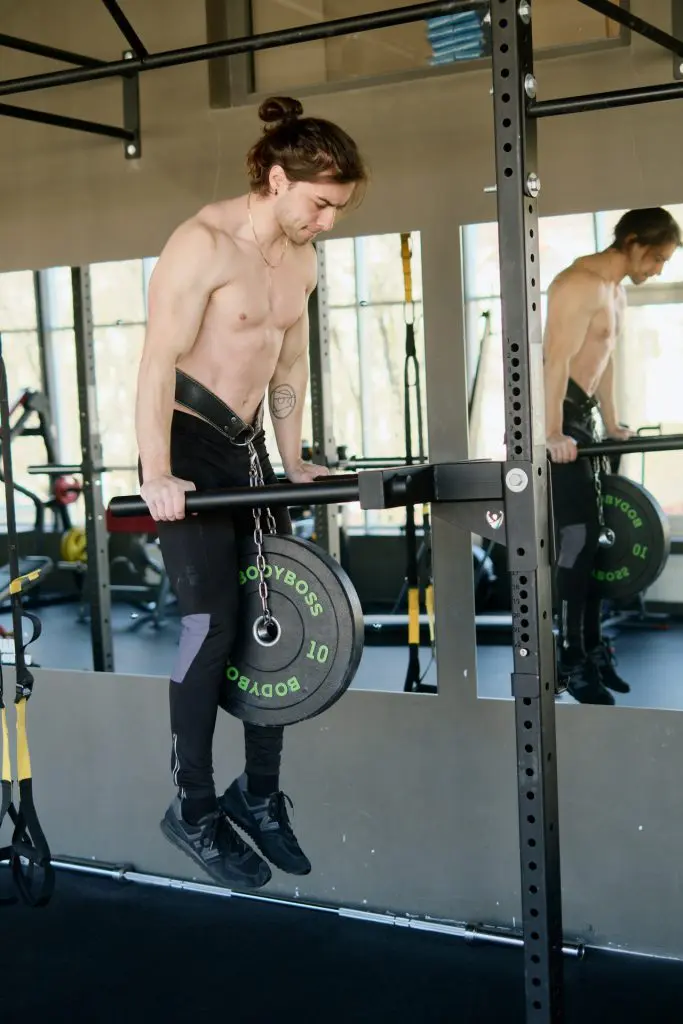
Weighted dips. Image sourced via Pexels
Seated Dips
Dips can easily be adapted into a seated variation by using a gym bench, a raised platform or a chair behind you. Often classified as a bodyweight tricep extension, this variation is a versatile movement that requires no specialised gym equipment, making it perfect for home workouts.
To perform a seated dip, you place the heels of your hands on the edge of the elevated surface behind you, shift your hips just off the platform and lower your body by bending at the elbows. Unlike parallel bar work, your legs remain in constant contact with the ground throughout the set, acting as a supportive lever.
You can instantly alter the difficulty of a seated dip by adjusting your leg positioning:
The Straight-Leg Position (Standard): Extending your legs fully out in front of you with only your heels touching into the floor minimises leg assistance, forcing your triceps and chest to lift the vast majority of your torso weight.
The Bent-Knee Position (Beginner): Bending your knees at a 90-degree angle and placing your feet completely flat on the floor allows your legs to carry a significant portion of your weight. This acts as an excellent, self-assisted scale-down option for beginners building foundational pressing strength.
While your core and hip flexors have to work to maintain a clean posture, the primary focus is on isolating the arms and lower chest.
Next Step: Elevate your upper body training with our comprehensive guide on How to Bench Press with Perfect Technique or explore the best Tricep Isolation Exercises to build the strength required for higher-volume dip sets.
Build Up Your Baseline: If you find supporting your entire body weight on the parallel bars too difficult right now, don’t drop the movement. Switch over to our guide on the Machine-Assisted Dip Variation to safely build up your pressing power using a counterweight system.
💬 Join the Discussion!
We would love to hear about your experience with dips and how you integrate them into your routine. Drop a comment below and share your thoughts on these questions:
- What is your preference? Do you prefer traditional bodyweight dips, or do you find the assisted dip machine better for targeting specific muscle groups?
- Grip variations: Do you actively alter your grip width to shift the focus from your triceps to your chest, or do you stick to a standard position?
- Progression milestones: If you started out on the assisted station, how long did it take you to transition over to full, unassisted parallel bar work?
- Advanced variations: Have you tried demanding variations like gymnastic rings or using a weighted dipping belt? What tips do you have for mastering them?
Leave a Reply