The Squat
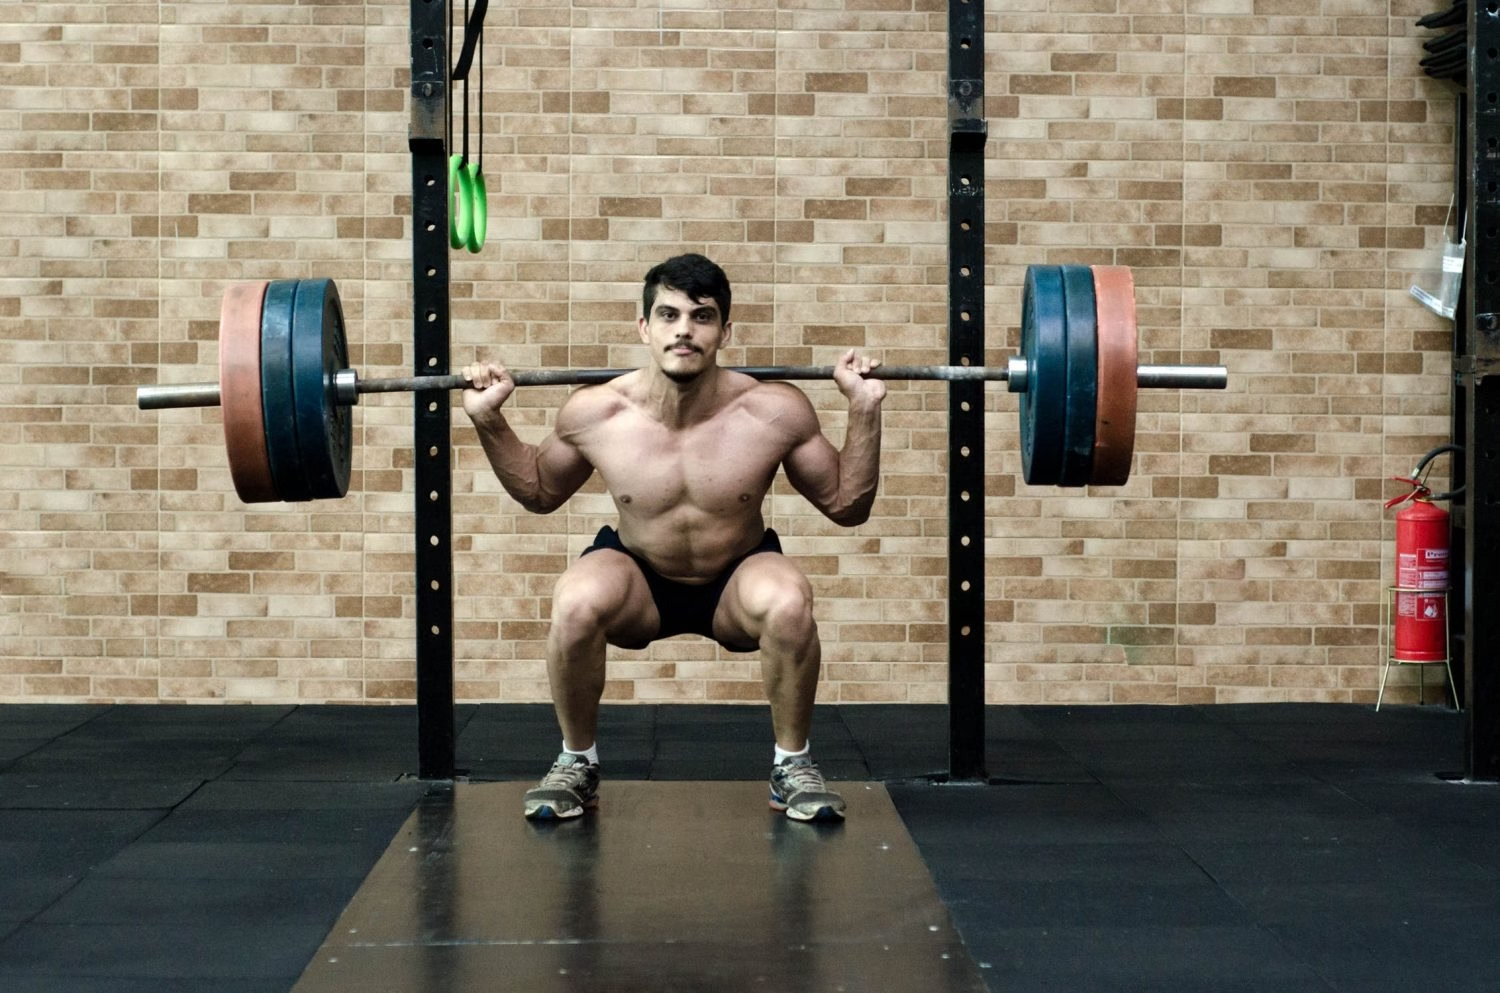
The squat stands as the gym floor’s undisputed king of lower-body development. Unlike machines that isolate single muscles, this powerful compound exercise forces your entire lower body to work as a unit to handle heavy loads and stimulate total-body muscle growth.
Because it requires a dual mix of power and core stability, it serves as the foundational opening lift in competitive powerlifting, anchoring the “Big Three” disciplines.
Squatting successfully demands excellent hip mobility, a rigid torso brace and precision foot placement.
What is the Squat?
The squat is one of the premium lower-body exercises. It is a classic compound lift, meaning it recruits multiple different muscles to move the weight.
The squat stands as one of the three foundational lifts in competitive powerlifting, alongside the deadlift and the bench press.
To perform it, you support a loaded barbell across your upper back and shoulders, drop your hips into a deep bend and power back up to standing.
Looking for a weight-free option? You can also use the bodyweight squat to build baseline strength and master your movements before adding weights. Check out our breakdown of other types of squats further down this page.
Header image: Pexels
History of the Barbell Squat
Squatting is a foundational movement pattern we do naturally every day, without even thinking about it. We squat when we sit down and stand up from a chair; we squat when we pick a heavy object up from the floor. Even climbing stairs uses the same squatting action, where we use our legs to push down and power upward.
Yet until the mid-20th century, the barbell back squat wasn’t a mainstream gym lift. For a long time, weightlifting culture focused almost entirely on upper-body aesthetics. The chest, arms and back were considered far more important than leg development.
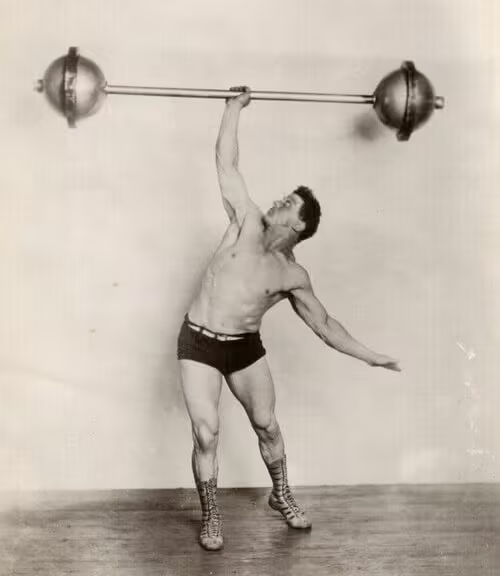
That mindset shifted dramatically between the 1920s and 1940s. The flat-footed barbell squat gained initial momentum through pioneers like Italy’s Marquis Alfred Pallavicini and legendary strongman-wrestlers like Milo Steinborn.
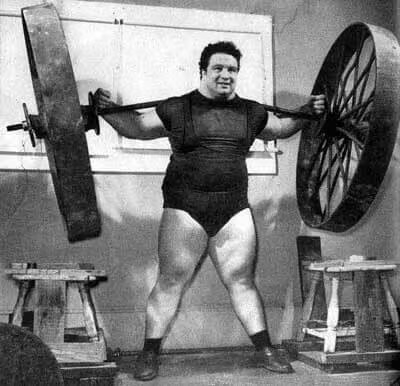
In the 1950s, Olympic weightlifter Paul Anderson shocked the world with his squatting prowess. Anderson engineered a makeshift backyard gym using 55-gallon drums to practice squats. He then shattered records by performing squats exceeding 900 pounds, a feat previously thought to be anatomically impossible.
From that time on, the barbell squat was officially crowned as the ultimate test of full body power.
Today, it rules the gym floor as a mandatory pillar of the “Big Three” power lifts, alongside the bench press and the deadlift.
-

- Paul Anderson training in the 1950s with his famous makeshift barbell made from giant wagon wheels | Andrea787878, Public domain, via Wikimedia Commons
-
- Milo Steinborn demonstrating his full-body strength with a one-armed barbell lift around 1920. | Family member? His wife or a friend (dead by now…), Public domain, via Wikimedia Commons
What Muscles Does the Squat Work?
Because it’s a multi-joint powerhouse, the squat hammers almost every muscle below your waist:
- The Thighs: Your front thighs (quadriceps) and inner thighs (adductors) do a huge amount of the heavy lifting.
- The Posterior Chain: Your hamstrings (back thighs) and glutes (buttocks) drive your upward power.
- The Core & Lower Back: Your lower back (erector spinae), abdominals and hip flexors hold tight to keep you stable.
- The Lower Legs: Your calves (gastrocnemius and soleus) work constantly to anchor your balance.
- Stabiliser Muscles: Dozens of smaller helper muscles act as stabilisers to support your core and keep your frame steady.
Benefits of the Squat
If your goals are building quad volume, getting lean, sculpting your glutes or building functional strength, the squat is non-negotiable.
It is the ultimate leg-strengthening lift and triggers a metabolic response across your whole body. But it doesn’t just build muscle. Regular heavy squatting strengthens your entire frame, toughening up bones, ligaments and tendons to keep your joints resilient.
What you gain from every single set:
- Total leg development and mass: Packages deep, functional muscle density into your quads and hamstrings while packing size across your whole frame.
- Boosted strength and explosive power: Drives massive athletic power through your hips and lower body.
- Upgraded mobility and depth: Promotes hip flexibility and ankle depth that opens up tight joints and improves everyday movements.
- Stronger knees and lower back: Increases knee stability and spine resilience to protect you against everyday strains.
- High-speed fat loss: The heavy compound demand burns maximum calories, boosting your metabolism to turn your body into a lean machine.
- Targeted aesthetic sculpting: It is the best way to build and sculpt your glutes and thighs.
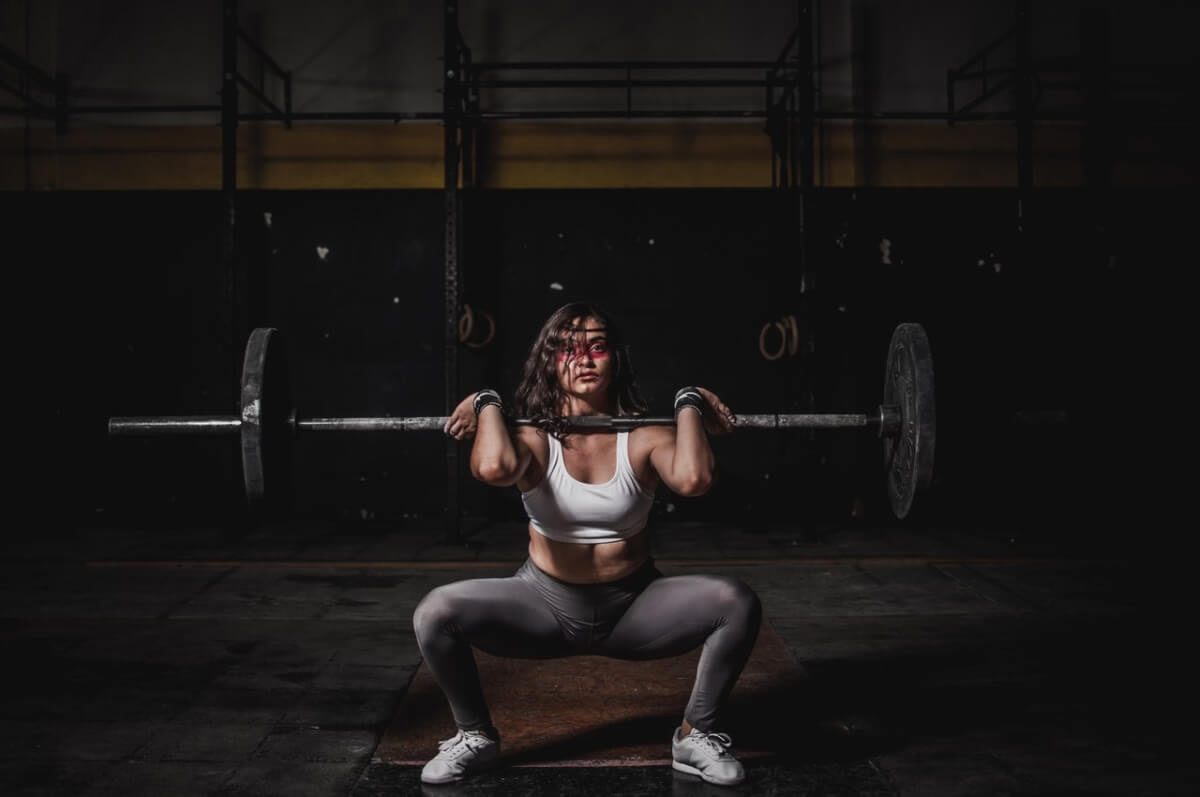
Barbell Front Squat. Image sourced via Pexels.
Squat Positioning and Stance
Your foot placement on the gym floor, your hand placement and where the bar sits on your back change everything. These setup metrics affect your leverage, spine safety and exactly how much weight you can safely move.
Don’t be afraid to experiment with slight adjustments until you find the exact stance and positioning that feels strongest for your frame.
Finding Your Squat Stance
Before you ever un-rack the bar, you need to establish a solid foundation. Start by centering yourself perfectly under the barbell. Grip evenly just outside shoulder width, look straight ahead and duck your head beneath the bar.
As you wedge yourself into position to lift the barbell off the J-cups, focus on your lower back. Never allow your lower back to round as you take on the load. Keep your spine perfectly rigid with a tight, natural arch in your lumber region.
Step back and set your feet roughly a shoulder-width and a half apart (or slightly wider) and flare your toes slightly outward. Never let your toes point straight ahead or turn inward, as this compromises your knee alignment.
Squat Bar Positioning: High Bar vs. Low Bar
Where the barbell rests across your shoulders is a matter of personal preference and your specific training goals. There are two primary schools of thought for placing the bar on your shoulders:
Low Bar Squat Technique
This is the standard placement favoured by powerlifters. Secure the barbell roughly two inches below the top of your shoulders, resting it directly along the base of your traps and across the meaty shelf of your posterior deltoids.
As you pull your elbows back, your upper back muscles naturally bunch together to create a solid cushion that holds the bar in place, allowing you to safely use all your lower-body power.
High Bar Squat Technique
If you prefer a more upright torso shape, the high bar variation sits right at the base of your neck, resting directly on the meat of the upper trapezius muscle.
This placement option shifts the leverage forward, driving deeper quadriceps engagement at the bottom of the movement.
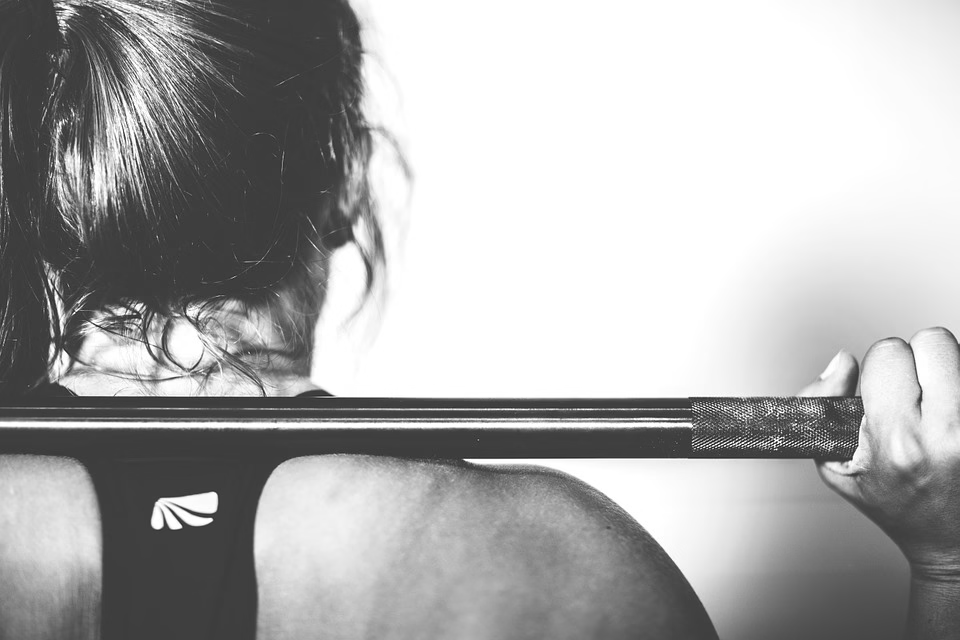
High Bar Barbell Placement. Image sourced via Pixabay
Mastering the Squat Grip
Bracing a secure bar requires active upper-body engagement. When gripping the barbell, pull your hands inward as close as your shoulder mobility allows.
Tightening your grip width naturally forces your shoulder blades to pinch together, instantly creating a thicker muscle shelf to support the load.
Strict Rules for a Safe Grip:
- Drive elbows up and back: Keep your elbows pointing backward behind the bar rather than dropping directly underneath it.
- Use a pronated grip: Keep your palms facing away from you throughout the entire set.
- Keep wrists straight: Do not allow the wrists to bend backward or flex under the bar, which reduces power and strains the joint.
- Thumbs on top (“squat grip”): Place your thumbs over the top of the bar alongside your fingers, rather than wrapping them underneath. Unlike the bench press, where you wrap your thumbs around the bar for safety, the squat is safest with this thumbless grip, as it prevents your wrists from twisting backward under the weight.
If you let your wrists bend or allow your elbows to drop vertically under the bar, the heavy load will instantly shift onto your small arm joints. This forces your wrists, elbows and shoulders to carry the weight, leading to joint strain or a mechanical drop. Your upper back should take the entire weight to minimise your risk of injury.
Protecting Your Skin: Squat Pads
If you are new to heavy lifting, the steel knurling can sometimes bite into your neck or skin. If this discomfort is affecting your form or positioning, clipping a dense foam squat pad around the centre of the barbell is an easy way to cushion your shoulders.
If your gym doesn’t have one, wrapping a clean towel around the bar works as a quick fix. If you do this, just ensure the towel is wrapped tightly so it can’t slide around mid-rep.
How to Perform the Squat: Step-by-Step Execution
Good squatting technique relies on a blend of a strong stance and grip combined with a controlled loading phase. Moving the bar smoothly ensures you can use maximum weight comfortably reducing your risk of injury.
If you are a newcomer to the iron, it is highly recommended to practice these movement paths using the unweighted bodyweight squat first. This allows you to master your hip depth, knee alignment and foot pressure before putting weight on your back.
The Execution Phases
A safe squat requires a disciplined approach to un-racking, descending and ascending. Every rep should be performed with deliberate control, eliminating any jerking motions or momentum shifts.
1. The Setup and Step-Out
To un-rack the barbell, wedge yourself tightly beneath, brace your torso and drive straight up using your legs to clear the hooks.
Never attempt to good-morning or strip the bar out using your lower back. Your spine should remain perfectly vertical as you take the load. Keep the bar path centered firmly over the middle of your feet.
Take one deliberate step backward with your first foot, followed by the second, clearing the rack pins completely. Establish your foot positioning with your heels placed slightly wider than shoulder width apart.
Look at a fixed spot on the floor roughly 10 to 20 degrees ahead of you to naturally align your neck and spine. Keep the barbell lined up directly over your hips and keep your back rigid and upright. Your elbows should be pulled high and back, ensuring your wrists stay perfectly straight.
2. The Descent (Breaking Parallel)
Take a deep breath and brace your core. Initiate the movement by moving your hips backward, keeping your shins upright before your knees begin to bend.
This hip-hinge focus immediately loads your powerful glutes and hamstrings, placing you in a strong position to control the movement of the squat.
Lower your body under close control. At the base of the lift, the angles at your hip and knee joints should be roughly equal, with your lower shins maintaining a stable anchor.
Drop down until the top surface of your thighs sits parallel to the floor, or slightly below 90 degrees.
Ensure your knees align perfectly with your flared toes, never allowing them to overshoot the front of your feet excessively.
Maintain muscle tightness throughout the entire lowering phase, keeping your elbows up to keep tension in the upper back.
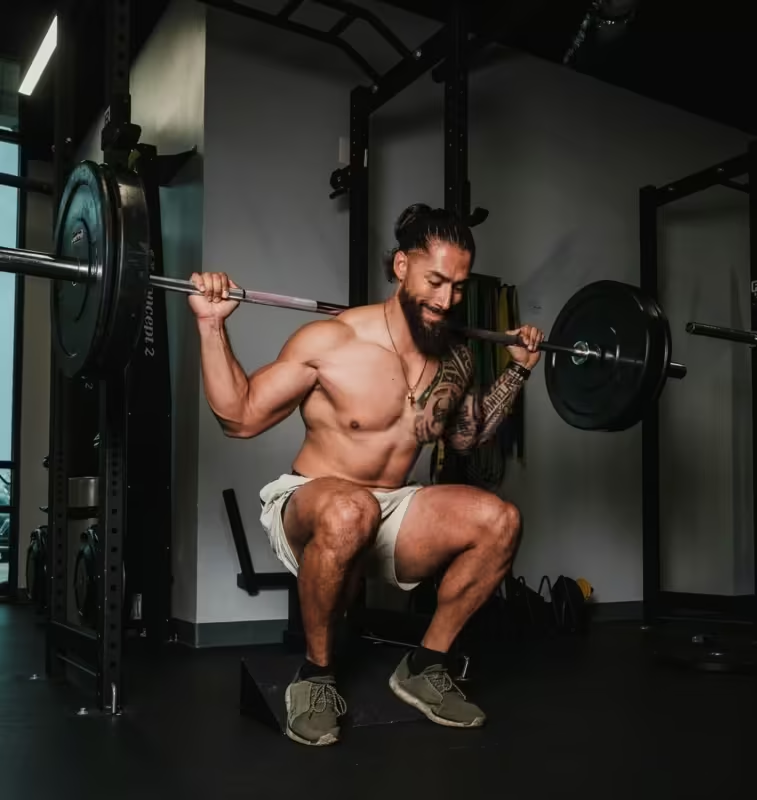
Squat Descent – In the “Hole”. Image sourced via Pexels.
3. The Ascent (Driving Out of the Hole)
Once you hit full depth, reverse the momentum by driving through the mid-foot and heel. Exhale forcefully as you power out of “the hole” (the weightlifting term for the very bottom position of a deep squat), keeping your chest up and your head stable.
Never bounce at the bottom of the lift to catch a rebound, as this uncontrolled impact creates destructive shear forces on your knee joints. Focus on keeping your ankles rigid to provide a solid platform against the floor.
Keep the weight balanced across your arches and heels rather than sliding onto your toes. Drive your legs upward smoothly, keeping your back rigid.
While your upward drive should be faster and more explosive than the descent, it needs to remain fully stable and balanced from start to finish.
4. Racking the Barbell
Once you are fully standing, walk the barbell straight forward until it firmly contacts the rack hooks. Slowly drop your hips down to let the bar settle securely into the J-cups before releasing your grip. Ideally, this should all be monitored by your spotters.
Common Squat Form Errors to Avoid
- Descending too rapidly: Dropping too quickly destroys your reverse mechanical tension. If you descend with strong downward momentum, you might find yourself pinned “in the hole” and fail your ascent.
- Lifting with a rounded spine: Taking the bar off the J-cups with a rounded back reduces power and risks injuring the spine. Keep your core braced completely rigid while your shoulders take the weight.
- Leaning forward (“Good Morning” squat): Letting your hips rise faster than your shoulders forces your torso to lean forward, placing severe stress on your lower back.
COACHING TIP: Beware the “Good Morning” Squat
A traditional Good Morning is a useful hip-hinge exercise where you bow your torso forward to target the hamstrings and lower back. However, when driving out of the bottom of a heavy back squat, letting your hips shoot up faster than your shoulders forces your torso to lean dangerously forward over the floor.
This accidental “Good Morning Squat” turns your spine into a mechanical lever, dumping severe shear stress straight onto your lower back. If you feel your torso collapsing forward, drop the working weight by 10% and focus on driving your shoulders back against the bar as you push up from the bottom of the squat.
- Cutting depth short or squatting too deep: Stopping above parallel limits your glute recruitment and loads the patellar tendons unevenly. However, you should only drop as low as your flexibility safely allows.
- Ego lifting: Overloading the bar beyond your capacity triggers wobbly tracking, knee cave and technical breakdowns.
- Bar misplacement: Setting the barbell too high aggravates your neck vertebrae, while letting it slide too low forces a forward bend. Keep a low-bar shelf across your rear delts.
- Dropping the elbows: Letting your elbows fall forward unbraces your upper back, causing your wrists and forearms to take the weight, which leads to joint fatigue.
COACHING TIP: Fixing Knee Cave
If you notice your knees caving inward at the bottom of a heavy working rep, do not ignore it. Work to actively fix this structural tracking issue and protect your joints by building lateral hip stability using the Seated Adductor and Abductor Machines.
Squat Safety and Injury Prevention
Pushing your limits under a heavy barbell is exactly how you get your lower body to adapt, grow and get stronger. However, moving heavy weight without a disciplined approach to joint protection can lead to frustrating strains and joint pain.
To safeguard your longevity, you need a straightforward safety system that respects your body’s structural limits. If you want to read more about comprehensive gym floor guidelines, explore our master class on types of injuries and how to avoid them.
The Greatest Risks for the Squat
Your structural safety starts with a stable, wide footprint. Setting your feet too narrow restricts your hip mechanics and places undue, shearing pressure directly onto your patellar tendons.
Proper foot placement optimises your balance, allows a stronger squat and increases your safety margins.
The Sticking Point: The Start and Finish Phases
Any experienced trainer will tell you that a massive portion of squatting accidents don’t actually happen during the deepest part of the rep. Instead, they occur at the very start and finish of the exercise, when taking the bar from its hooks or returning it to the rack.
A simple lapse in mental focus when stripping the bar off the J-cups or walking a barbell back into the hooks is where the vast majority of technique failures happen.
Total psychological focus is mandatory the moment your hands touch the iron.
Throughout every rep, maintain intense muscle tension across your entire frame. Never slouch, relax your spine or lose tension at the bottom of the movement. Keep your core fully engaged and your abdominals locked, as this intra-abdominal pressure protects your lower back from buckling.
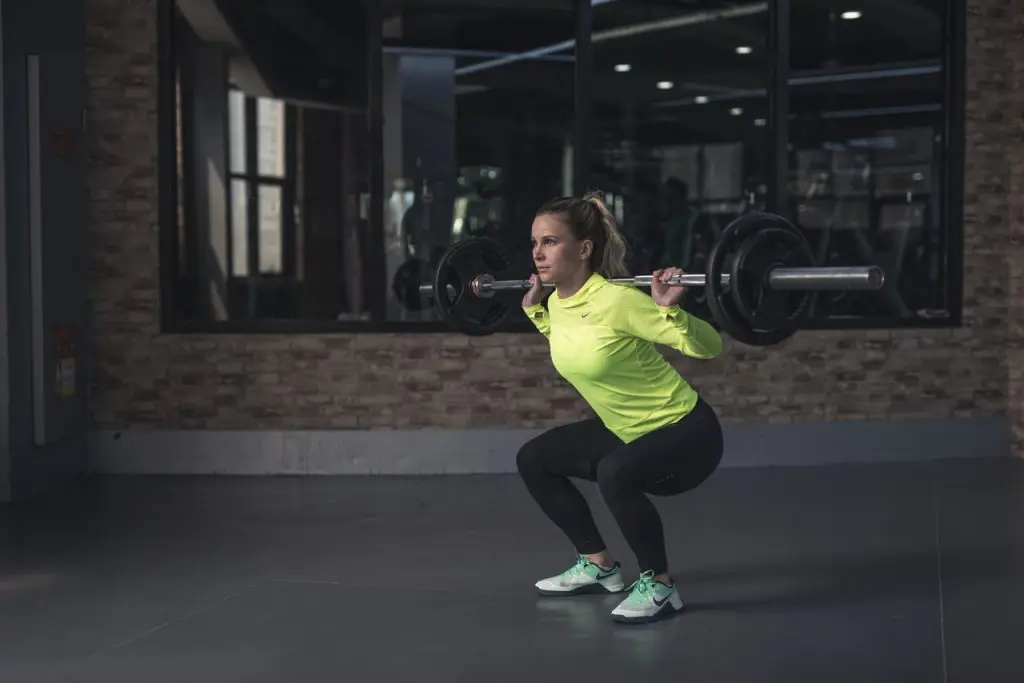
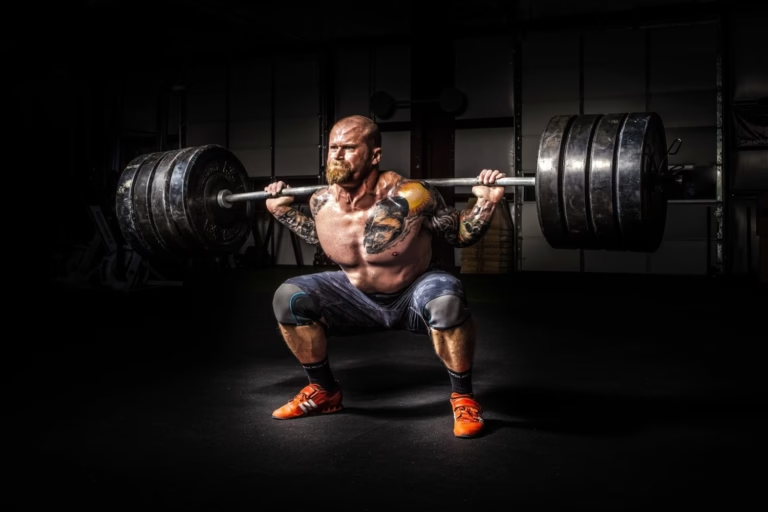
Parallel Back Squat. Image sourced via Pexels.
Essential Squat Safety Precautions
When testing your physical boundaries or attacking heavy working sets near failure, having a training partner on hand is essential. A reliable spotter serves as a safety net, standing ready to assist the moment your technique breaks down or your leg drive stalls.
To maximise your safety on the squat:
- Control the eccentric phase: Take two to three full seconds to lower the weight smoothly, maintaining rigid tension in your thighs, lower back and abs.
- Avoid wobbly tracking: Keep your attention focused entirely on the lift to eliminate sudden momentum shifts or torso shaking.
- Push your feet into the floor: Actively push outward through your heels to prevent your knees from caving inward under heavy loads.
Choosing Your Station: Power Cages, Squat Racks and Smith Machines
If you’re training solo without a partner, choosing the right gym equipment is your first line of defense. Selecting the right station alters your safety layout, your stability demands and how you interact with the barbell.
To help you understand exactly how these training stations differ on the gym floor, look at this quick overview:
| Station Type | Barbell Path | Safety Mechanisms | Primary Best Use |
|---|---|---|---|
| Power Cage | Free weight (Moves in any direction; requires total balance) | Adjustable steel rods that span across the inside to catch a failed lift | Max-effort solo lifting where total safety is required |
| Squat Rack | Free weight (Moves in any direction; requires total balance) | Short safety arms (J-cups) protruding forward | General training where you want freedom but have a spotter |
| Smith Machine | Fixed vertical track (Bar is locked on a rigid sliding rail) | Twist-and-lock hooks on the bar along with bottom bumper stops | Targeted muscle isolation and beginner rehabilitation |
A heavy-duty power cage features adjustable safety steel pins that are designed to catch a dropped barbell instantly if you fail a rep, preventing the bar from pinning you to the floor.
Always set these safety bars an inch below your lowest parallel depth so they never restrict your clean range of motion, but remain high enough to save your joints during a technical miss.
Alternatively, the Smith machine provides a stabilised guided track where the bar moves solely along fixed vertical runners, allowing you to instantly lock the weight out with a quick twist of the wrist. This built-in catch system eliminates the need for active spotters entirely.
To explore how these setups compare to selectorised resistance frames, check out our comprehensive guide to Weight Machines.
The Free Weight Advantage
While guided tracks offer supported movements and give confidence for newcomers, relying on them permanently can stall your physical development.
Because a Smith machine guides the bar along a rigid path, it strips away the mechanical demands of balance and stabilisation. This means you will easily lift more weight on a machine track, but you miss out on true, real-world conditioning.
To build a balanced, resilient body, prioritise free weights whenever possible. Forcing your frame to stabilise a moving barbell recruits dozens of deep helper muscles, leading to superior coordination and balance.
If you enjoy the machine track, weave in plenty of free-barbell sets to keep your routine engaging and target your legs from every angle.
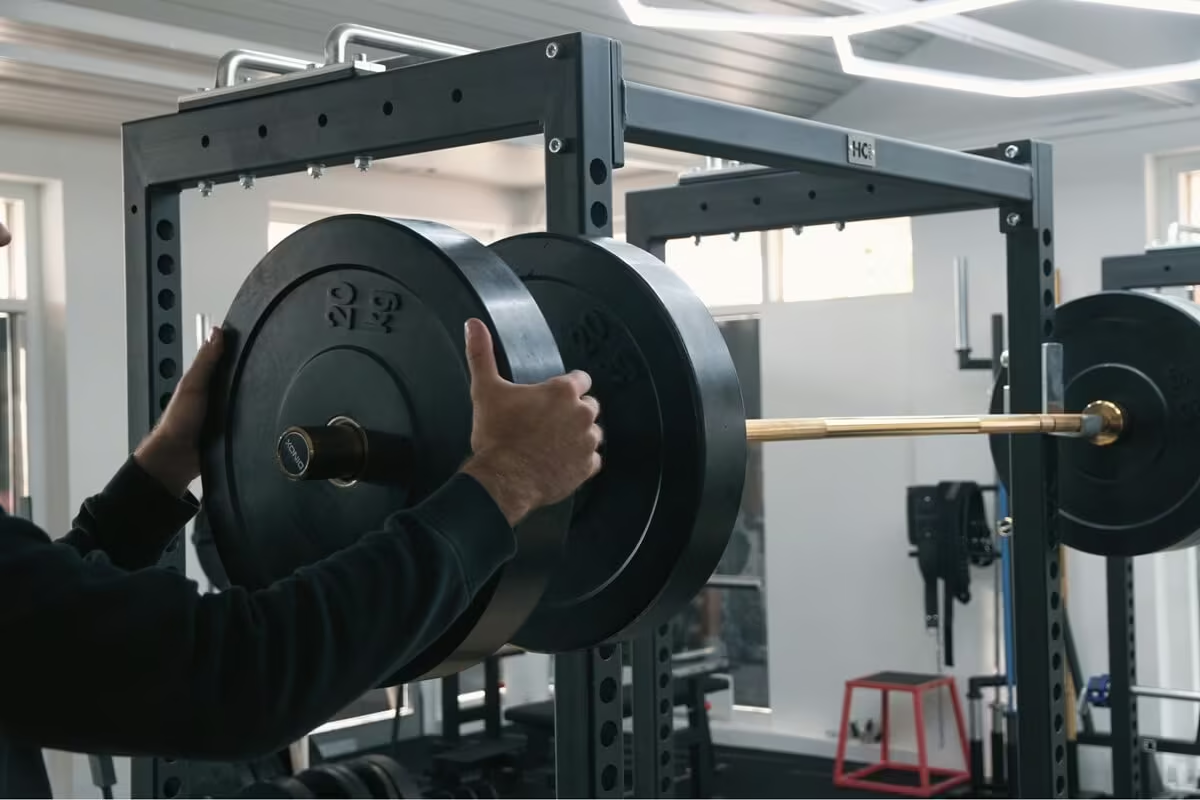
Power Cage. Image sourced via Pexels.
When to Use a Weight Lifting Belt
A thick leather weightlifting belt is a performance tool designed to stabilise your lower spine and maximise your lower-body power.
A common gym myth suggests that wearing a belt makes your core lazy or weak, but sports science actually proves the opposite. A belt doesn’t replace your natural core strength. It simply gives your abdominal wall a rigid column to brace and push against.
Biomechanical data published in the National Institutes of Health database confirms that wearing a weightlifting belt significantly spikes intra-abdominal pressure by 25% to 40% compared to lifting unbelted. This internal pressure creates a rigid cylinder within your abdominal cavity, structurally reinforcing your trunk and protecting your lower spine.
Electromyography (EMG) tracking shows that using a belt doesn’t decrease ab engagement. Instead, direct core muscle activity remains largely unchanged or slightly elevated because your abs and obliques need to work hard to drive the force outward into the belt.
However, a belt is a tool and not a shortcut to skip learning proper bracing techniques. To build a resilient back and develop natural core stability, you should use a belt strategically during your sessions:
- Warm-up sets (Unbelted): Leave the belt off during your warm-ups. This forces your deep stabilisers, obliques and abdominals to manage the load independently.
- Working sets (Belted): Clip your lifting belt on for your heaviest top sets that exceed 75% to 80% of your 1-Rep Max. This lets you safely drive your quads and glutes to failure without pressuring your lower back (erector spinae).
If you are currently managing a weaker back or working around core stabilisation issues, deploying a belt strategically is an effective way to protect your lower back while you carefully scale up your lower-body training volume over time.
Once you have finished your heavy compound sets, you can safely isolate fatigued glutes without adding any further load to your spine by stepping over to the Glute Machine.
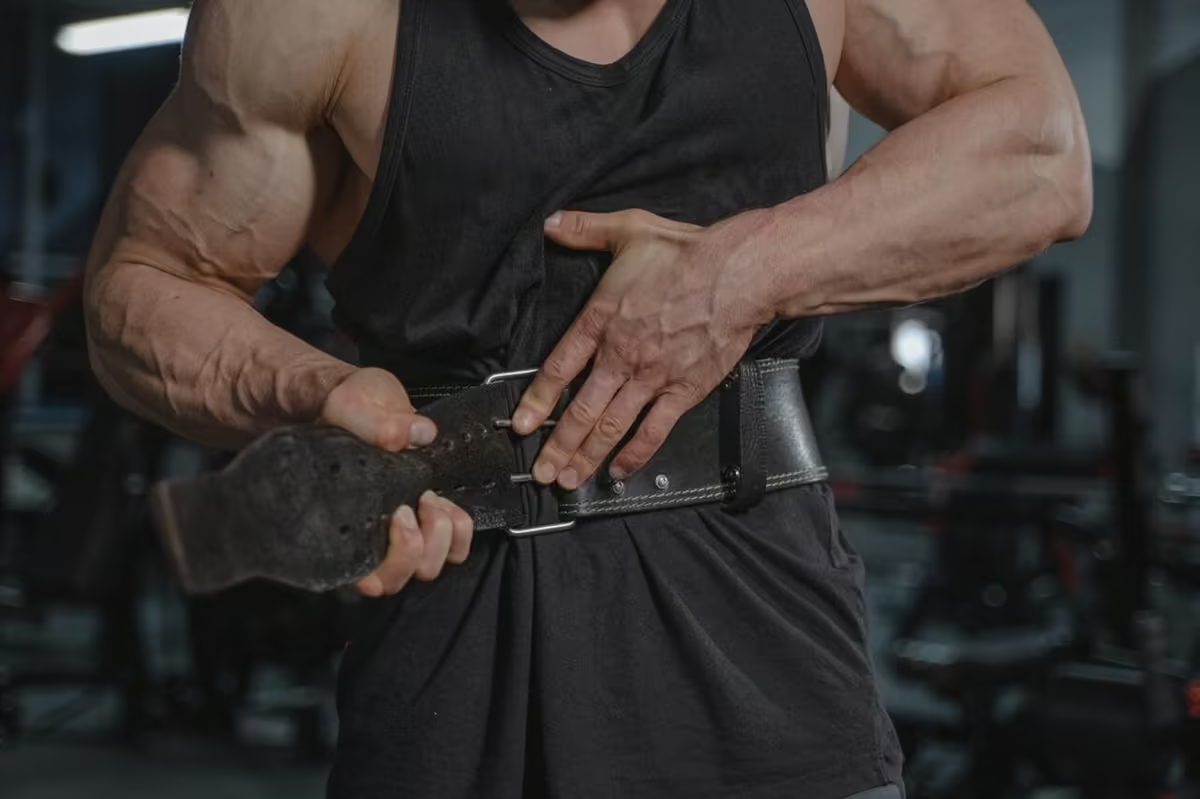
Lifting Belt. Image sourced via Pexels.
Variations on the Squat Lift
There is a huge variety of squat variations to choose from. The movements you build into your routine depends entirely on your training goals, flexibility levels and overall proficiency under a barbell.
Altering your depth, bar placement or loading mechanics completely changes how the movement impacts your body.
By shifting these variables, you can target different segments of your thighs and core. Once you’ve built your baseline stance and secure grip, you need to decide which specific variation to use.
The Most Common Types of Squats
Each squat variation serves a distinct purpose on leg day. Let’s analyse the most effective variations you can use to switch up your lower-body workouts.
Before looking at the specific equipment setups, it’s important to understand that a squat is defined by two distinct components: the depth and the mechanical variation.
Changing up these variables allows you to customise your training to match your performance level, mobility and training goals.
Understanding Squat Depth
How low you descend during a rep determines which muscle groups take on the majority of the load. Altering your depth changes the joint angles of your hips and knees, directly impacting the overall intensity and safety of the movement. Below are the three primary depth markers used to gauge your range of motion:
The Half Squat
Shallow depth exercise
This high-depth variation intentionally cuts the range of motion short, reversing the movement well before your thighs drop parallel to the ground.
It typically finishes with a shallow knee bend of roughly 45 degrees away from a straight leg.
The half squat is a good regression tool for beginners building core confidence and it serves as a bodyweight exercise. If you’re currently working through knee pain, cutting your depth short is a smart way to stimulate your legs without triggering further joint inflammation or injury.
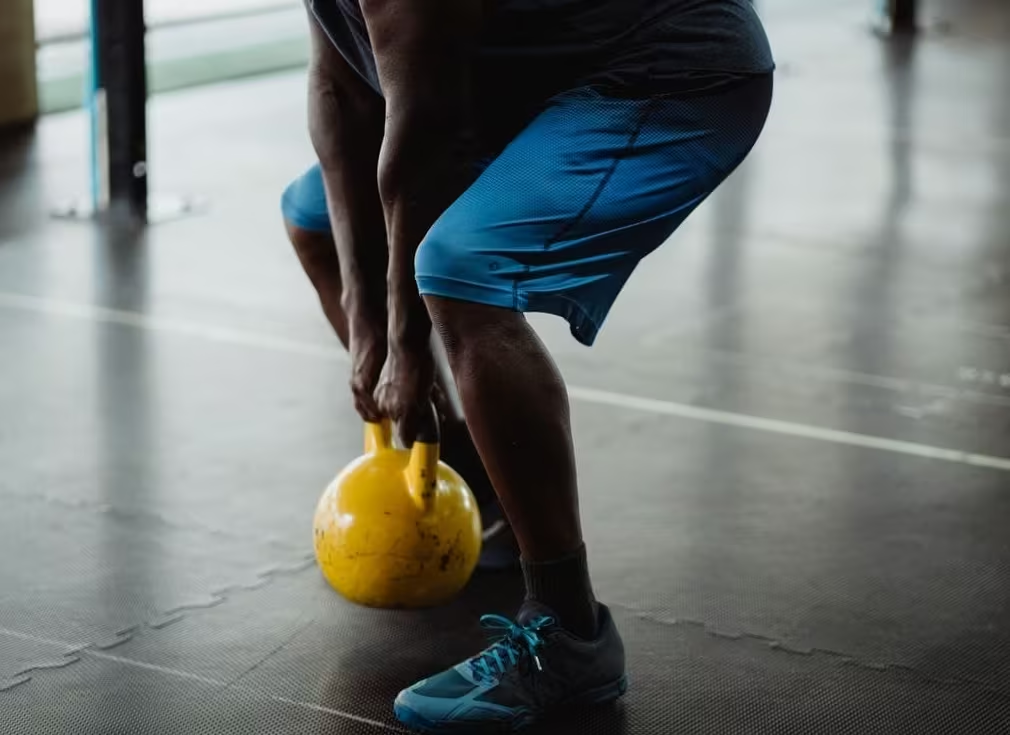
Shallow Squat. Image sourced via Pexels.
The Parallel Squat
Standard gym depth
This is the standard gym squat used in everyday weight training splits. To hit parallel, you lower your pelvis until your knees form a 90-degree angle and your thighs sit perfectly flat relative to the gym floor.
When lifters discuss a standard gym squat, this is universally the variation they mean.
The Deep Squat / Full Squat
Max anatomical depth
This is an advanced variation where you drop your pelvis far past parallel, forcing your knees into an acute angle at the bottom of the rep. This large range of motion provides a strong hypertrophy stimulus for your glutes and thighs, but it requires excellent joint mobility to execute safely.
Indeed, sports science shows that shear forces actually decrease at the bottom of a deep squat due to the “wrapping effect” (the thighs making contact with the calves). This means deep squats are safe to do even with heavy weights, provided the lifter has sufficient mobility.
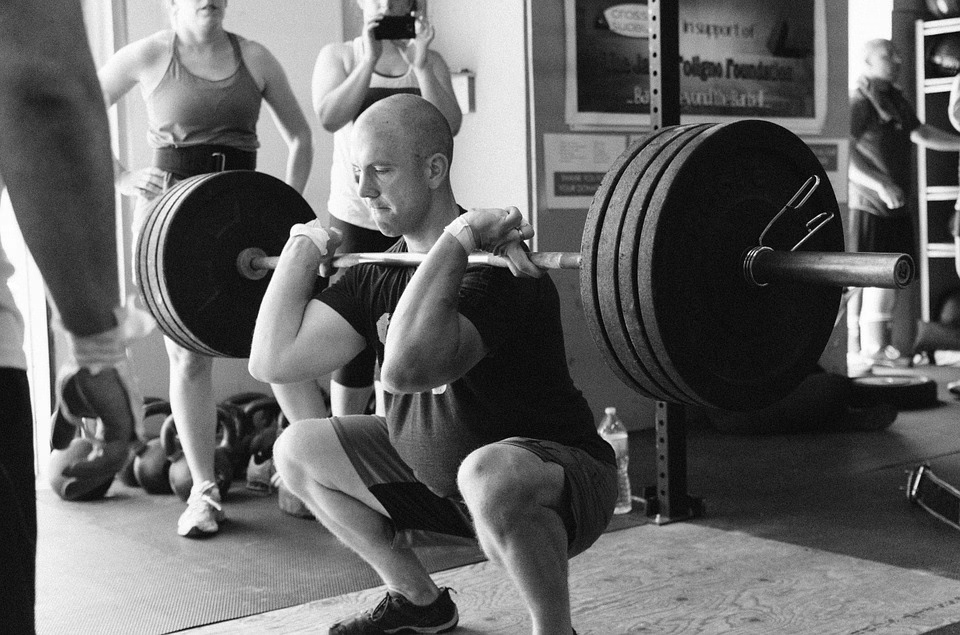
Deep Squat (Front). Image sourced via Pexels.
The Most Effective Squat Variations
Once you choose your depth, you can choose a specific variation based on how you want to load the weight. Shifting a barbell from your back to your chest, or switching to single-leg movements, completely moves the centre of gravity and alters the exact muscles used. Here are the most powerful squat variations to build into your weekly routine:
The Back Squat
The standard baseline movement
This is the solid bread and butter of lower-body training. The barbell rests securely across the back of your shoulders behind your neck. It serves as the baseline posture for standard strength splits and branches out into several sub-variations.
The Olympic Squat
The high-bar, vertical-torso variant for weightlifters
The Olympic squat is an elite high-bar back squat variation used by competitive weightlifters to build the massive leg strength required to stand up after catching heavy weights in their cleans and snatches.
This squat variation demands maximum knee flexion, requiring the lifter to maintain a perfectly vertical torso and drop their hips all the way down until their hamstrings touch their calves.
It is one of the most mechanically demanding movements you can perform on a gym floor, requiring excellent ankle mobility.
The Front Squat
The anterior, barbell-on-chest variant
In this variation, the barbell rests across the front of your clavicles and shoulders, supported by your fingertips or a clean cross-arm rack. Shifting the load to the front of your body forces your torso to stay completely upright, eliminating lower-back leverage and placing direct tension onto your quads.
Because front-loading shifts the joint stress forward, it places a higher demand on your knees. It should only be used by experienced lifters. If you’re just learning this movement, it’s best to start with a light, empty barbell in a standard squat rack.
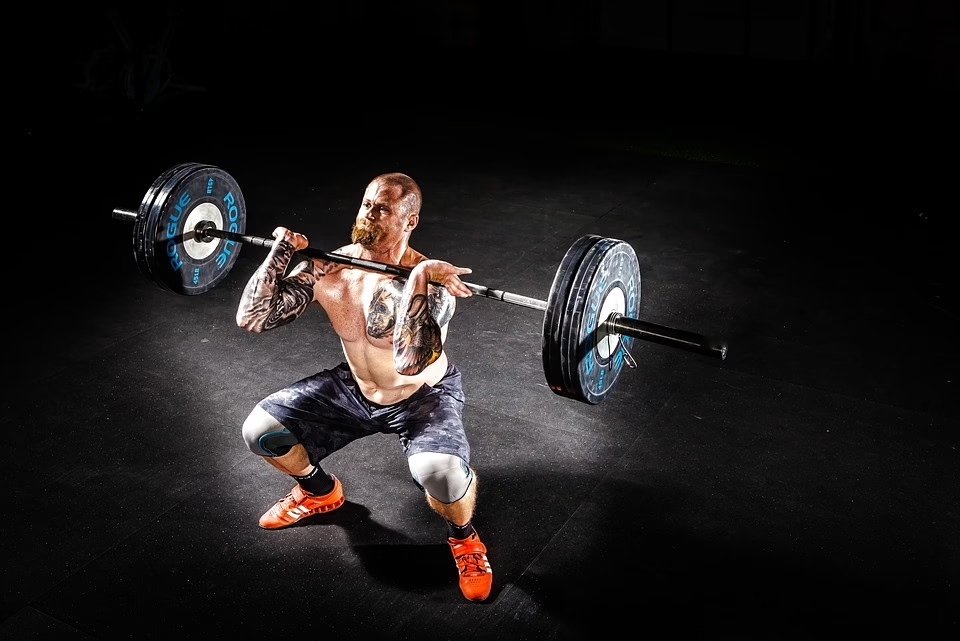
Front Squat. Image sourced via Pixabay.
The Safety Squat Bar (SSB) Squat
The specialised yoke-bar variant for joint relief
The Safety Squat Bar (SSB) squat uses a specialised training bar featuring a padded neck harness and handles projecting forward over your shoulders. This yoke design shifts the centre of gravity downward and forward, mimicking the upright posture and intense quads recruitment of a front squat, while remaining safely loaded on your back.
Because you hold onto forward-facing handles rather than reaching back to grip a straight bar, it removes stress from your hip joints, wrists and elbows. It’s an excellent strength-builder and a great training alternative for lifters dealing with shoulder injuries or mobility limitations.
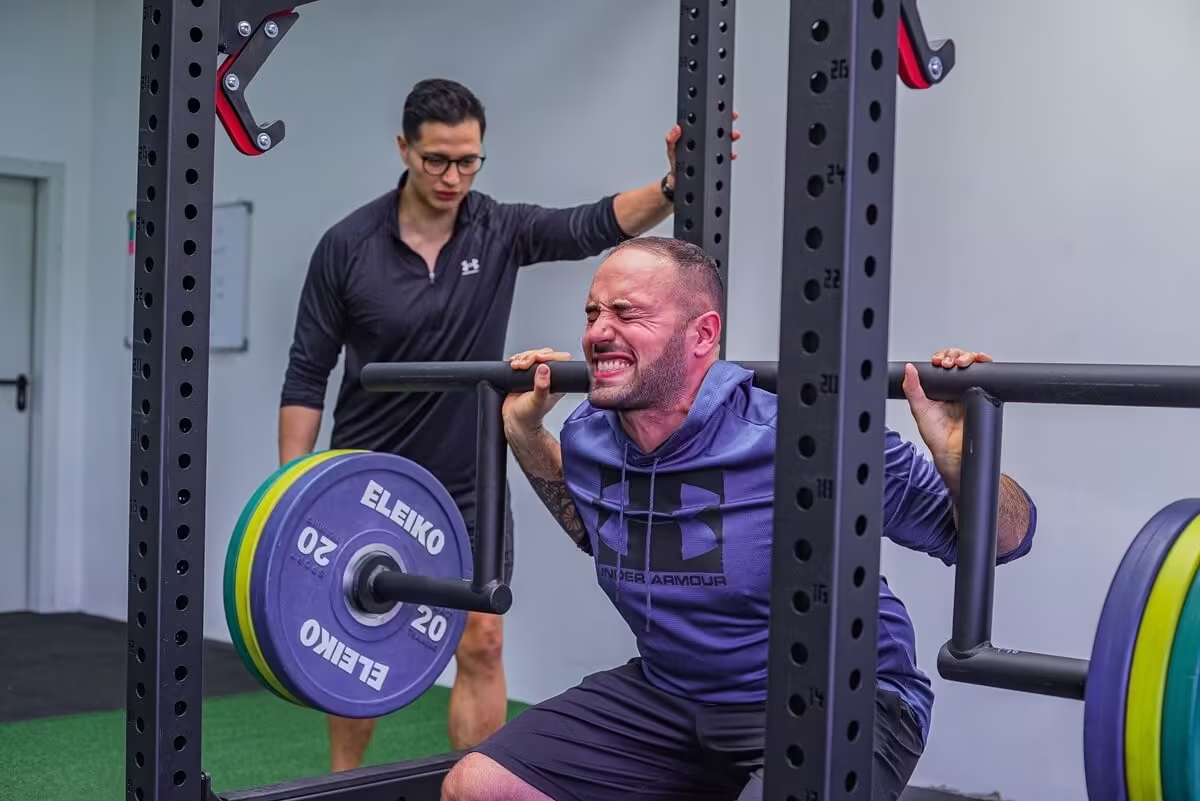
Spotted SSB Squat. Image sourced via Pexels.
The Sumo Squat
The wide-stance variant targeting the inner thighs
The sumo squat is a wide-stance variation where you place your feet roughly twice as wide as shoulder-width and flare your toes outward.
This wide positioning completely shifts the emphasis of the lift away from your lower back and re-directs the tension onto your glutes and inner thigh muscles (adductors).
Because of the wide structural setup, this movement typically finishes right at parallel rather than dropping into a deep depth, making it an excellent option for lifters looking to build hip strength without overworking their knees.
Goblet Squat
The beginner-friendly, dumbbell/kettlebell variant
The goblet squat is a great learning tool for mastering squat movements. Instead of placing a barbell on your back, you hold a single dumbbell or kettlebell vertically against your chest, cupping it with both hands.
This anterior load acts as a natural counterweight, allowing you to sit straight down between your hips with an upright torso. It is highly accessible and very safe on the lower back.
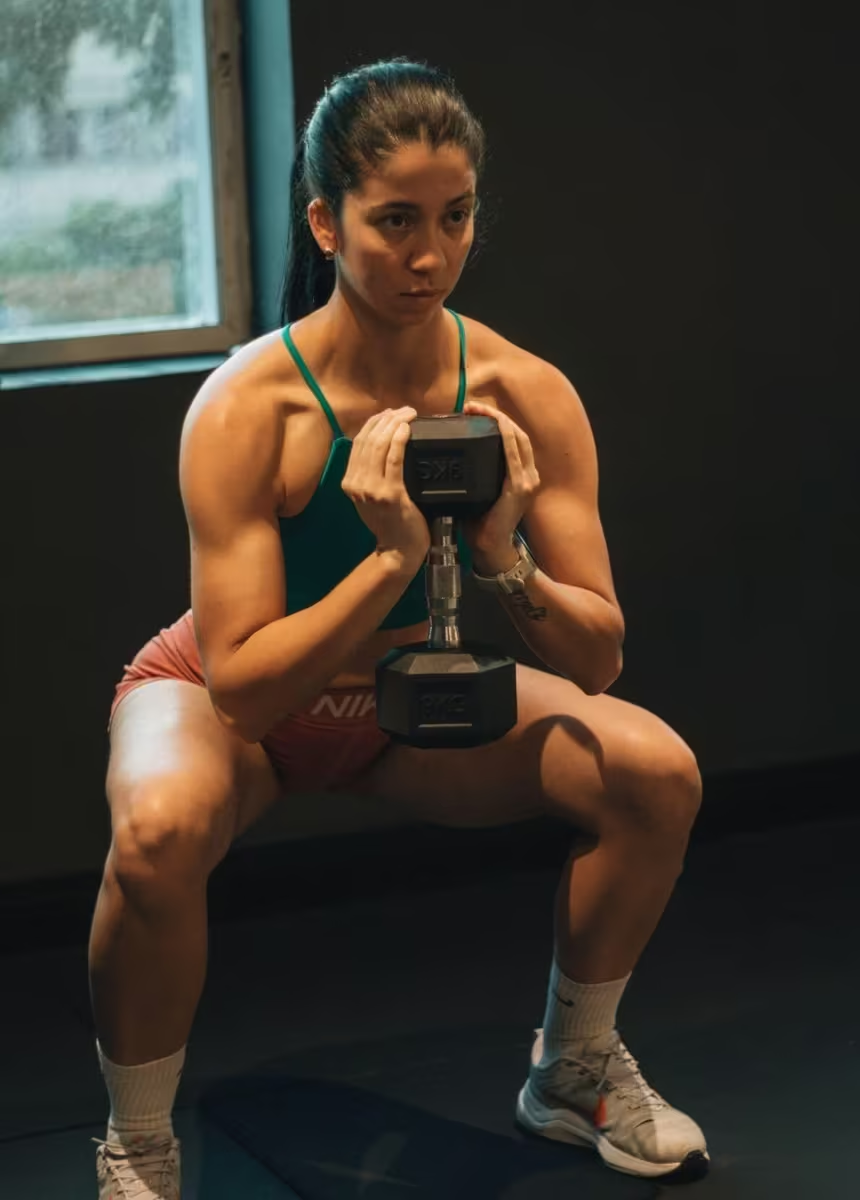
Goblet Squat. Imaged sourced via Pexels.
Bulgarian Split Squat
The single-leg, bench-elevated variant
This is a unilateral (single-leg) variation designed to reduce strength imbalances and build stability. You stand facing away from a gym bench, placing your rear foot elevated flat on the surface behind you.
From this split stance, you lower your hips until your back knee almost touches the floor, driving all of the load through your front leg. It places zero compressive load on your spine while intensely targeting the quads and glutes.
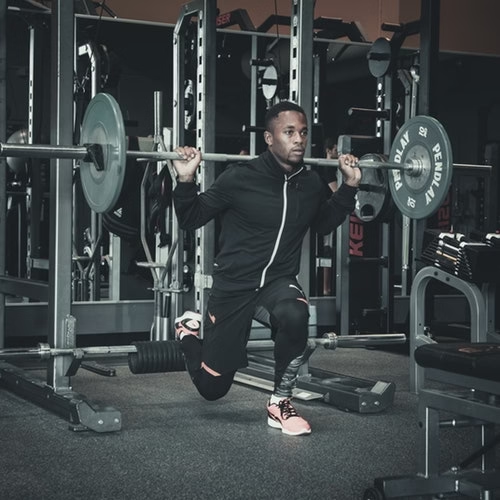
Low-Elevation Bulgarian Split Squat. Image sourced via Pexels.
The Leg Press Machine Alternative
While the barbell back squat reigns supreme for full-body athletic power, the leg press machine serves as an alternative for targeted thigh growth.
Because your back is supported by the machine pad and your path of motion is safely guided, your core stability and lower spine are removed as limiting factors.
This allows you to safely train your quads and glutes to failure, making it a perfect variation if you are working around a back injury or looking to maximise leg hypertrophy without fatigue.
Pick Your Progression
Build Supporting Muscles: A powerful back squat requires strong hamstrings and upper back. Discover the best movements to ramp up your lower-body in our Master Guide to Compound Lifts.
Protect Your Knees: Heavy squatting can take a toll on your patellar tendons if your joint alignment slips. Learn how to keep your legs tracking along a safe, pain-free path by studying our master guide on Injury Prevention and Safety.
Beat the Plateaus: If your lower-body progress has stalled, your biological recovery and muscle fueling might need tweaking. Learn how to optimise your nutrition and rest for maximum strength in our Nutrition and Fueling and Sleep and Recovery guides
What’s Your Squat Strategy?
We want to hear about your experiences under the iron. Drop a comment below to share your thoughts:
- Your Current PR: What is your current squat personal record, or what specific lower-body weight milestone are you chasing next?
- Bar Placement: Do you prefer the powerlifting low-bar technique to maximise hip leverage, or do you stick to a high-bar placement for deeper quad engagement?
- Sticking Points: Where do you usually fail a heavy rep? Right out of “the hole” at the very bottom, or halfway up through the middle of the ascent?
- Favourite Squat Variation: Do you stick strictly to the classic barbell back squat, or do you prefer variations like front squats, safety squat bars or machine work to build your legs?
- Breakthrough Advice: For the experienced lifters, what is the #1 technical tip or accessory lift that helped you smash through a squat plateau? For beginners, what is the biggest challenge you are facing with your depth?
- The Safety Setup: Do you only attack heavy working sets when you have a spotter on hand or do you rely on safety pins inside a power cage when training solo?



Leave a Reply