The Bench Press
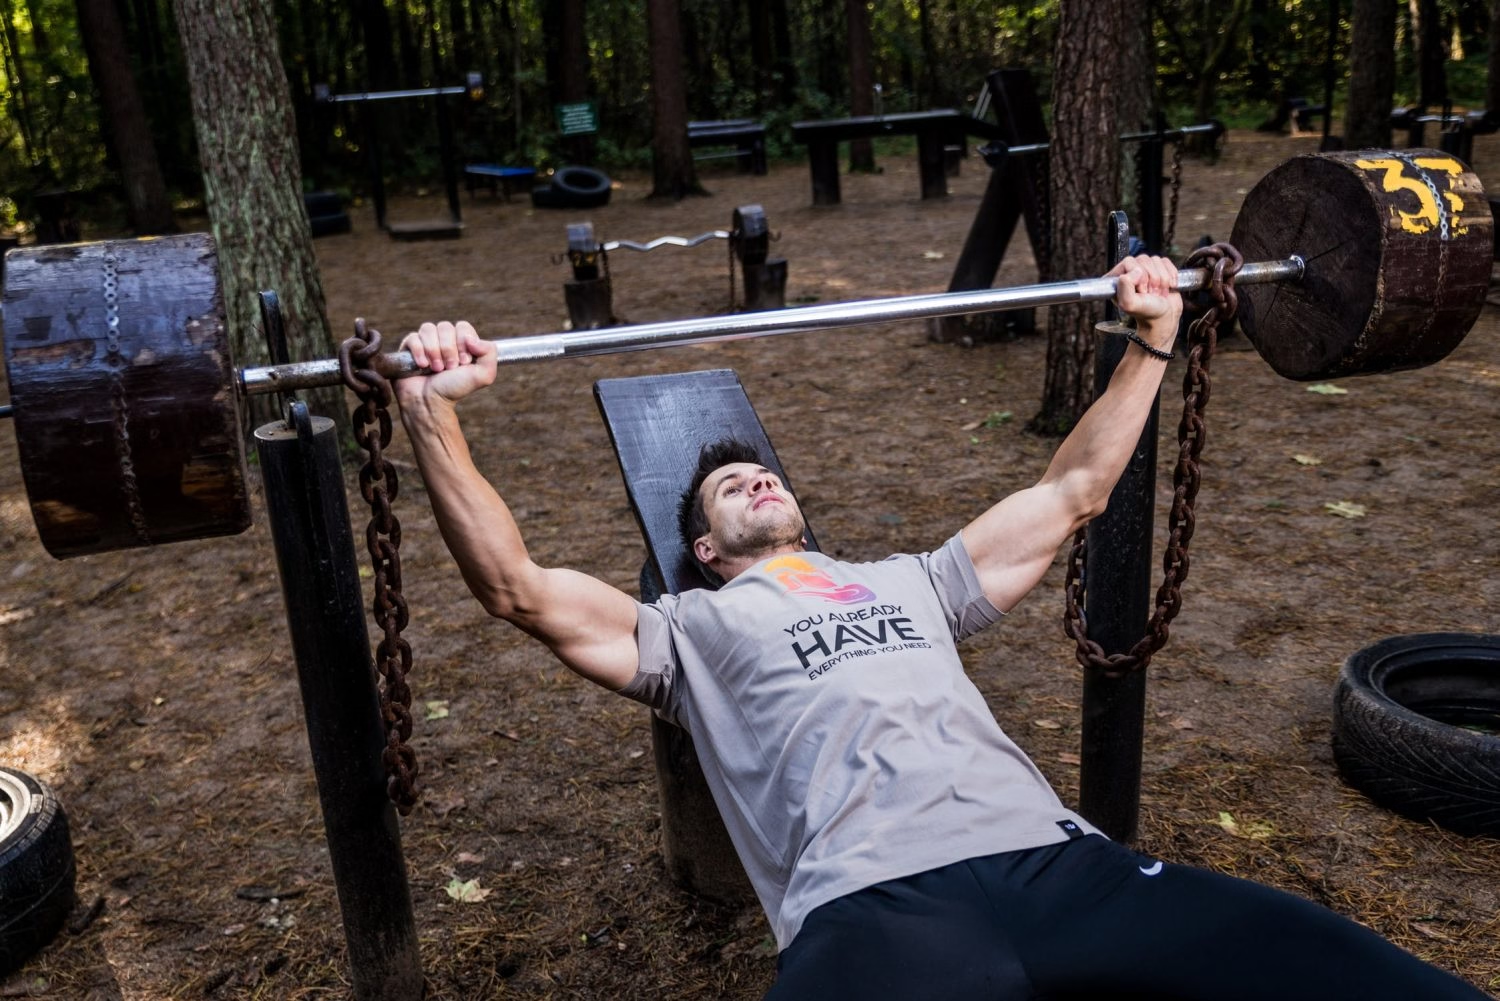
The bench press is arguably the most popular and effective upper-body lift in the gym. As a foundational compound exercise, it allows you to handle heavy loads to drive massive strength and muscle growth in your chest, shoulders and triceps.
It is so essential to functional power that it serves as one of the “Big Three” lifts in competitive powerlifting, alongside the squat and deadlift.
However, building a powerful press requires far more than just lying down and pushing. Truly mastering this lift demands a disciplined blend of proper body positioning, a stable grip, step-by-step technical execution and strict safety protocols.
Header image: Pexels
What is the Bench Press?
At its core, the bench press involves lying on a specialised bench, lowering a loaded barbell to your chest, and pressing it back up to full arm extension.
Beyond pure chest development, a properly executed bench press improves your functional pushing power, upper-body stability and even your bone density. It is the ultimate test of upper-body strength.
Whether you are looking to fix your form, lift heavier weights safely, or explore new variations, this ultimate guide covers everything you need to know to conquer the bench.
The Evolution of the Bench Press
From floor-bound strongmen to the ultimate gym flex
Before the bench press became the universal measurement of gym strength, early athletes performed the floor press.
In 1899, famed strongman and wrestler George Hackenschmidt (popularly known as “The Russian Lion”) set a world record by lying flat on his back on the floor, pulling a 164 kg (361 lbs) barbell over his face onto his chest and pressing it upward.
With no racks or spotters available, early lifting required incredible wrestling-style bridging and acrobatics just to get the weight into position
By the 1930s, lifters began experimenting by lying on primitive wooden boxes and padded planks to gain a deeper range of motion for their chests.
To aid in launching massive weights, athletes popularised a ballistic, high-momentum hip thrust off the floor known as the “belly toss.”
This technique sparked fierce debates over cheating until the Amateur Athletic Union (AAU) officially banned bridging and belly-tossing in 1939. This ruling standardised the strict, flat-backed press from the chest that we recognise today.
The final piece of the modern setup emerged in the 1950s when bodybuilders and powerlifters introduced mechanical rack stanchions to hold the bar. This eliminated the dangerous necessity of having assistants manually hand a barbell down to a lifter.
By the time legendary lifters like Doug Hepburn and Pat Casey achieved the 500-pound and 600-pound milestones in the mid-20th century, the flat bench press was officially cemented as the undisputed king of upper-body exercises.
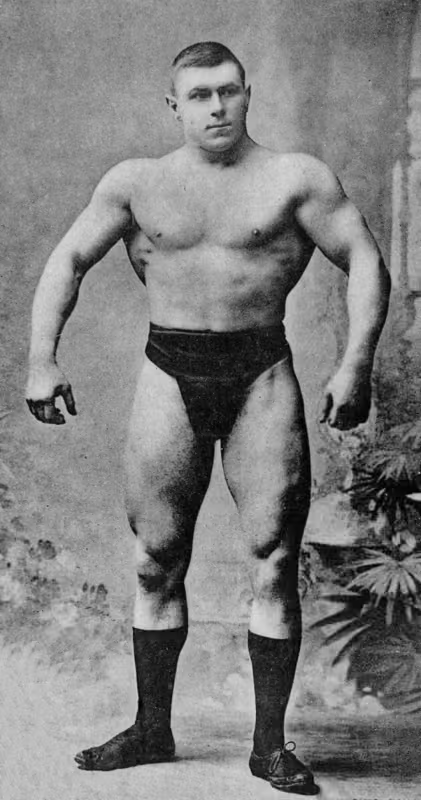
George ‘The Russian Lion’ Hackenschmidt in a studio portrait, early 1900s. Before the flat bench press was popularised, Hackenschmidt used floor presses to forge an elite, world-record-setting physique. muis.ee, Public domain, via Wikimedia Commons.
What Muscles Are Used in the Bench Press?
The bench press is highly efficient because it recruits multiple muscle groups simultaneously. While it’s primarily a chest builder, this exercise requires a coordinated effort across your entire upper body:
- Pectoralis Major (Chest): The primary mover. The bench press targets the bulk of your chest, driving muscle growth and pressing power.
- Anterior Deltoids (Front Shoulders): These assist heavily during the bottom half of the movement as you push the bar away from your chest.
- Triceps Brachii (Back of the Arms): These take over during the lockout phase to extend your elbows at the top of the lift.
The Role of Fixator Muscles
Beyond the primary movers, several fixator (stabilising) muscles lock your body into position to maintain a safe, rigid pressing platform:
- Rotator Cuff & Upper Back (Trapezius and Rhomboids): Pulling your shoulder blades together creates the solid foundation needed to protect your joints.
- Core (Abdominals & Erector Spinae): Your core braces to transfer power from your lower body through to your upper body.
Benefits of the Bench Press
As a premier compound exercise, the benefits of incorporating the bench press into your routine go a long way:
- Massive Upper-Body Strength: Allows you to overload your muscles with heavier weights than isolation movements (like chest flyes).
- Targeted Muscle Customisation: Altering your grip changes the emphasis. A closer grip shifts the workload to your triceps, while a wider grip emphasises the overall chest.
- Improved Shoulder Stability: Bracing the stabilising shoulder muscles against heavy loads builds joint integrity.
- Increased Bone Density: The heavy axial loading promotes bone mineral density in your upper body, protecting your skeleton as you age.
Equipment Needed for Bench Pressing
The bench press can be tailored to your specific goals and experience level based on the equipment you choose:
The Bench & Weight Options
- Flat Benches: The best option for developing baseline upper-body strength and overall chest hypertrophy.
- Incline & Decline Benches: Incline angles shift the focus to your upper chest (clavicular head), while decline angles target the lower chest.
- Barbells vs. Dumbbells: Barbells allow you to handle maximum weight and track progressive strength gains easily. Dumbbells offer a greater range of motion and help correct muscular imbalances between your left and right sides.
Essential Accessories
For lifters handling heavier loads, simple accessories can provide vital joint support. Simple accessories like wrist wraps or a lifting belt can provide additional support.
- Wrist Wraps: Stabilise the wrist joint, preventing it from bending backward under a heavy barbell.
- Lifting Belt: Increases intra-abdominal pressure, providing a more rigid torso and a more stable platform to press from.
Don’t forget that preparation is key. Using a foam roller on your upper back before pressing can drastically improve your shoulder mobility.
How to Track Your Bench Press Progress
Consistent progress requires consistent tracking. To ensure you aren’t plateauing, monitor these key training metrics in a workout log or app:
- One-Rep Max (1RM): The maximum weight you can lift for a single, clean repetition.
- Repetition Volume: Tracking your personal bests at specific rep ranges (e.g. your heaviest 5-rep or 10-rep sets).
- Total Training Volume: Calculated as Sets × Reps × Weight. Increasing this total over time ensures long-term muscle growth.
Training Frequency & Progression
Most effective training programs recommend bench pressing 1 to 3 times per week, depending on your recovery capacity and split.
You don’t need a highly complex, confusing program to see results. Applying the rule of progressive overload (simply adding a tiny bit of weight or an extra repetition to the bar each week) is the most reliable way to secure consistent strength gains.
How to Set Up and Position Your Body
A powerful bench press starts long before the bar leaves the rack. Taking the time to lock in your body positioning and grip ensures you can lift heavier weights, squeeze out more reps and protect your joints from injury.
To begin, lie flat on the bench. This can be either a standard Olympic bench press station or a flat bench set up inside a power rack.
Plant your feet flat on the ground on either side of the bench in a stable, wide stance (slightly wider than hip-width apart) with your knees bent and your calves perpendicular to the ground or slightly further back to create tension.
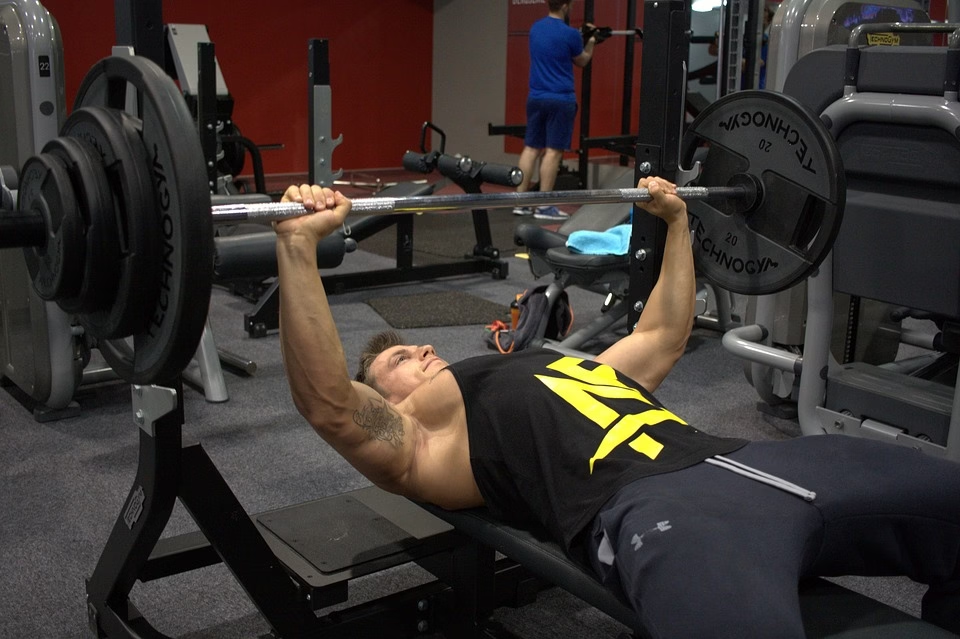
Bench Press. Image sourced via Pixabay.
The Three Main Points of Bench Contact
To build a strong foundation to your bench press technique, you should maintain three points of contact with the bench throughout the entire lift:
- Your Head: Resting flat on the bench, keep the back of your head touching the pad the entire time. Never raise your head to watch the bar, as this can strain the neck.
- Your Upper Back & Shoulders: Pinned firmly into the pad. Retracting your shoulder blades down and back creates a tight, stable base that protects your shoulders and boosts your leverage.
- Your Glutes: Anchored to the bench. Your hips should be glued to the pad, even when pushing heavy loads.
Creating the Setup Tension
While your head, shoulders and glutes should remain in contact with the bench at all times, try to maintain a slight, natural arch in your lower back. Do not let your spine go completely flat.
Keep your abdominals tight and your hips engaged, with shoulders pulled back and chest driven out.
Keeping your three point contact with the bench, along with full body muscle engagement and feet flat on the floor puts you in the best position to use your maximum pressing power.
Finding Your Perfect Bench Press Grip
Your grip width dictates how much weight you can move and which muscles handle the brunt of the load. Choosing the right width allows you to balance pressing power with joint safety.
Your bench press grip will also decide how much the synergist muscles, or ‘helper’ muscles, will aid in the movement.
Wide Grip vs. Narrow Grip vs. Standard Grip
- Standard Grip (The All-Rounder)
The Setup: Place your hands roughly 1.5 times shoulder-width apart (just wider than shoulder width).
The Benefits: This is the most advantageous positioning for strength. It allows your chest, shoulders and triceps to work hard together, making it the best choice for hitting a new personal record.
2. Narrow Grip (Triceps & Upper Chest Focus)
The Setup: Place your hands closer together, roughly shoulder-width apart.
The Benefits: A narrower stance heavily engages the triceps and shifts emphasis to the upper chest.
The Trade-off: Because you reduce the involvement of the larger chest and shoulder muscles, you will generally lift lighter weights here. It behaves more like a isolation lift rather than a maximum-power compound movement.
3. Wide Grip (Chest Overload)
The Setup: Place your hands significantly wider than 1.5 times shoulder width.
The Benefits: This shortens the distance the bar has to travel and maximises the stretch on the chest muscles.
The Trade-off: Exceeding a safe width places immense, unnatural stress on the anterior deltoids (front shoulders) and rotator cuffs, drastically increasing your risk of injury.
Hand Placement and Wrist Safety
Once you choose your width, your hand security and wrist alignment are paramount:
- Use a Full Overhand Grip: Always wrap your thumbs completely around the barbell, locking it securely against your fingers. Avoid the “thumbless” or “suicide” grip, as the bar can easily slip out of your hands.
- Keep a Neutral Wrist: Position the barbell deep in your palm, directly over the forearm bones. Your wrists must remain straight, firm and upright.
- Avoid Cocked Wrists: Allowing your wrists to bend backward strains the joint, leaks pressing power and drastically increases your risk of a wrist or forearm injury.
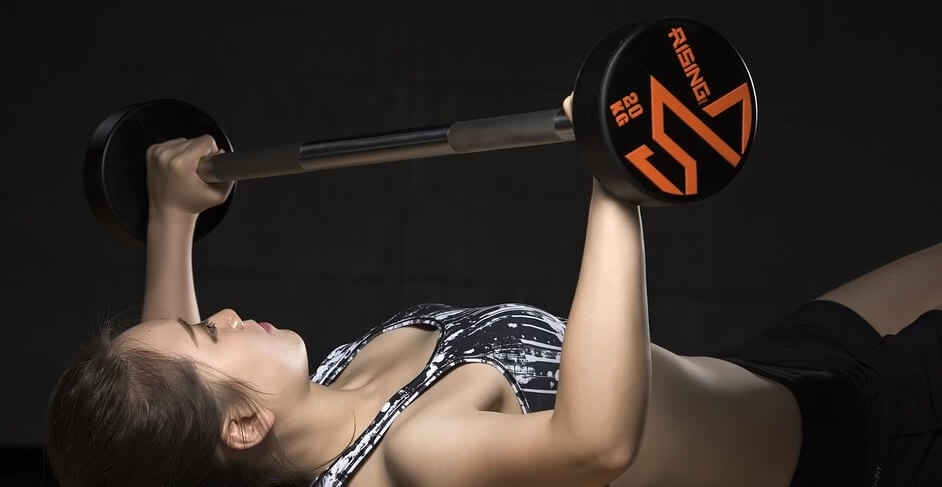
Bench Press. Image sourced via Pixabay.
Step-by-Step Bench Press Execution
Mastering the bench press requires combining your setup, grip and total-body tension into one fluid, controlled movement.
1. The Unrack
- Position: Lie back so the barbell rests directly above your eyes.
- The Lift-Off: Grip the bar securely, brace your core and unhook the weight from the rack by straightening your arms fully. If you are lifting heavy weights, you can use a spotter to assist with a smooth “lift-off” into the starting position.
- Establish Control: Settle the bar directly over your upper chest. Look straight up at the ceiling rather than tracking the bar with your eyes.
Coaching Tips: The Setup & Unrack
- The Straight-Arm Unrack: Always unhook the weight from the rack with straight arms. Your arms are at their strongest when your elbows are extended, allowing your skeleton to support the load. Your arms should only start to bend once you have safely guided the barbell directly above your mid-chest and are ready to begin the descent.
- Maintain White-Knuckle Tension: Squeeze the barbell tightly throughout your entire set. Keeping a crushing grip on the bar instantly activates the stabilising muscles in your forearms and shoulders, drastically improving bar control and preventing the barbell from slipping out of your hands.
2. The Descent (The Eccentric Phase)
- The Path: Take a deep breath in through your nose, brace your abdominals and lower the bar in a slow, controlled trajectory toward your mid-to-lower chest.
- Alignment: Keep your upper back tight and your shoulder blades squeezed together. Ensure your wrists remain neutral and perfectly stacked directly above your elbows.
- The Touchpoint: Lower the bar until it gently touches your chest. Never bounce the barbell off your ribcage or let it sink into your torso. If you have to rush the descent or rely on gravity, the weight is too heavy.
Coaching Tips: Mastering the Descent
- The Controlled Arc: Do not drop the bar straight down from your eyes. The descent should follow a slight diagonal path down and forward, ending at your mid-to-lower sternum.
- The 45-Degree Elbow Rule: As the bar descends, tuck your elbows slightly inward so they form a 45-to-60-degree angle with your torso. Avoid flaring your elbows completely out to the sides at a 90-degree angle, as this places immense, harmful shear stress directly onto your rotator cuffs.
- The 3-Second Rule: To maximise muscle hypertrophy (growth) and protect your joints, aim for a 2 to 3-second descent. Counting to three in your head guarantees you are controlling the weight rather than letting gravity pull it down.
3. The Ascent / The Press (The Concentric Phase)
- Drive: Drive your heels hard into the ground (leg drive) and push the bar upward away from your chest while forcefully exhaling.
- Elbow Tuck: Keep your elbows tucked at roughly a 45-to-60-degree angle relative to your torso. Don’t flare them completely out to the sides.
- The Lockout: Push the bar until your arms are fully extended at the top. Securely locking out your elbows transfers the weight safely to your skeletal structure, allowing you to reset for the next rep.
- The Completion: Once you are at the top of the ascent with extended arms, you are back in your starting position.
Coaching Tips: Mastering the Ascent
- The “J-Curve” Bar Path: When pushing the bar off your chest, do not push straight up. Instead, press the bar up and backward toward your face in a natural “J-shaped” arc. This trajectory keeps the load stacked safely over your shoulders, which is a mechanically stronger position that allows you to lift heavier weights.
- Leg Drive Integration: The moment the bar touches your chest, drive your heels into the floor as if you are trying to slide your body backward along the bench. This “leg drive” creates a wave of kinetic energy that travels up your body to help blast the bar off your chest during the hardest part of the lift.
- Set Your Shoulders Early: Keep your shoulder blades pulled together throughout the entire movement. Do not let your shoulders roll forward at the top of the press, as this takes the work away from your pectoral muscles.
4. Racking the Bar
- The Finish: Once you have completed your desired number of repetitions, carefully guide the barbell back into the upright supports until it firmly hits the back of the rack.
- The Drop: Once the bar hits the vertical backplates, let it drop down securely into the hooks. If you’re working with a spotter, they can guide the bar with you to ensure it settles perfectly back into the rack.

Bench Press. Image sourced via Pexels.
Common Bench Press Mistakes to Avoid
Even experienced lifters fall into bad habits that reduce pressing power and invite injury. Avoid these common pitfalls to keep your bench safe and effective:
Grip & Setup Pitfalls
- The Thumbless “Suicide” Grip: Grasping the bar without wrapping your thumbs around it is incredibly dangerous. If the bar slips, it will drop directly onto your chest or neck. Always use a secure, full overhand grip.
- Bar Too High in the Fingers: Settling the bar near your fingers forces your wrists to bend backward under the weight. This causes severe wrist pain and leaks pressing power. Keep the barbell resting deep in the meat of your palm, directly stacked over your forearm bones.
- Gripping Too Narrow: While a close-grip bench press is a great variation, gripping too narrowly on a standard chest day overloads the triceps, shuts down your pectorals and drastically limits the amount of weight you can safely move.
- Neglecting Back-to-Front Balance: The bench press heavily overworks the front of your body (chest and front shoulders). To prevent poor posture and shoulder injury, you must balance your routine by training your upper back and rear shoulders with horizontal rows and face pulls, not just more pressing movements.
Technical Execution Pitfalls
- Lifting Too Heavy, Too Soon: Ego lifting forces you to sacrifice your form to move the weight. Read our guide to find out if you are lifting too heavy for your current goals? Start light, master the technique and only add weight when your movement is perfectly consistent.
- Lifting the Glutes Off the Bench: While a natural lower back arch is proper biomechanics, lifting your glutes off the pad to cheat the weight up destroys your stability and places dangerous shear stress on your lower spine. Keep your hips glued down.
- Bouncing the Bar Off the Chest: Letting the bar drop and bouncing it off your sternum uses momentum to cheat the lift and risks fracturing your ribs. For maximum chest development, control the descent and let the bar gently touch your chest before pressing.
Bench Press Injury Prevention & Safety Precautions
While the bench press is highly rewarding, it carries inherent risks if performed carelessly. The most common lifting injuries affect the shoulders, wrists, chest and neck. Applying proactive safety measures ensures you stay gym fit.
Minimising Shoulder, Wrist and Neck Strain
- Develop Upper Back Balance: Many lifters develop a slouched, forward-shoulder posture from heavy benching. Because the bench press heavily overworks the front of your body, you must balance your routine with horizontal pulling movements (like Seated Rows and Face Pulls) to build your upper back and rear shoulders.
- Improve Mobility Safely: To achieve the flexibility needed for a deep press, incorporate Shoulder Dislocations (Passthroughs) using a light PVC pipe or resistance band before your workout to safely open up the chest and shoulders.
- Neutralise Neck Pressure: Neck pain often stems from pushing your head into the pad or tensing your neck muscles. Keep your neck completely neutral and relaxed, allowing the bench to fully support your head. Never twist your neck to look at the weights while pressing.
- Lock in Your Width: Maintain a grip roughly 1.5 times shoulder-width apart to distribute the weight evenly, preventing undue torque from twisting your wrists or forearms.
Chest Protection & Emergency Self-Rescue
The biggest danger during a solo bench press is having the bar fall down onto your chest and trap you against the bench.
The Mechanical Safeguard (Best Practice):
If you’re lifting without a spotter, you should bench press inside a power rack equipped with adjustable safety bars or catch pins. Set these pins just below your chest level.
These mechanical safeguards are designed to catch the barbell automatically if you fail a repetition, preventing the weight from making dangerous contact with your body. If you fail a rep, you can simply lower the bar onto the pins, allowing you to crawl out safely without the weight ever touching your body.
The Last Resort (“Roll of Shame”):
If you fail a repetition on a standard bench with no safety bars, you may have to resort to the “roll of shame.” This involves carefully lowering the bar to your stomach and rolling it down past your hips so you can sit up.
While this serves as an emergency survival skill for light weights, it is dangerous with heavy loads and can cause injuries. Lifting heavy weights alone without structural safety apparatus and relying on makeshift maneuvers significantly increases the risk of serious internal injuries, rib fractures or muscle tears.
If you want to keep your joints and skeleton protected over a lifetime of lifting, make sure to read our complete guide to injury prevention.
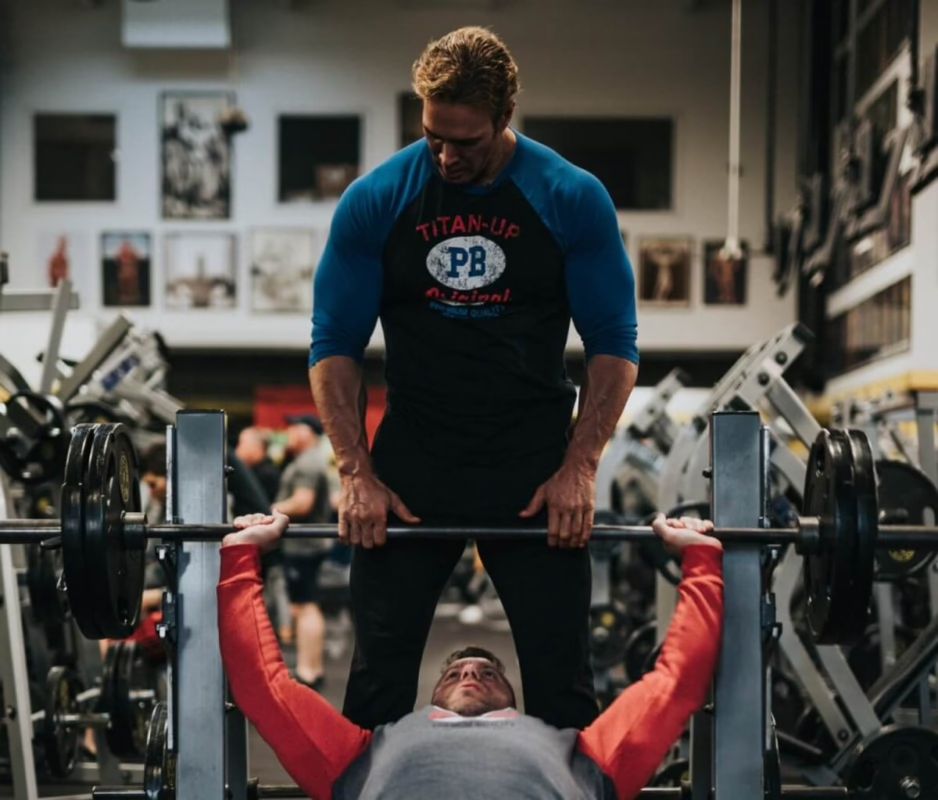
Spotting the Bench Press. Image sourced via Unsplash.
Standard Gym Spotting Rules
A great spotter shouldn’t just stand there; they are your primary line of defense. If you are spotting someone or teaching your training partner how to spot you, follow these rules:
- Communication is Key: Agree on a rep goal and a verbal “rescue cue” before the bar leaves the hooks.
- The Hands-Off Rule: Never touch the barbell while it is moving upward, even if it slows down. Only intervene if the bar completely stops moving, starts travelling downward or if the lifter explicitly asks for help.
- The Mixed Grip Assist: When rescuing a failed lift, the spotter should use an alternating/mixed grip (one palm up, one palm down) to pull the bar vertically back to the rack. This grip prevents the barbell from slipping out of the spotter’s hands if it gets heavy.
Bench Press Variations and Types
Varying your pressing angles allows you to shift the emphasis to different areas of your upper body, helping you break through strength plateaus and customise your muscle growth.
Flat Bench Press (Core Lift)
- The Setup: Performed while lying completely flat on your back.
- The Benefits: This is the standard lift for overall development, stimulating the entire chest (pectoralis major) and the front shoulders (anterior deltoids). A powerful chest can be built using this primary lift alone.
- The Reality: This variation allows for the most uniform distribution of weight across your entire chest. Because it sits right in the middle of the pressing spectrum, it serves as the baseline metric for measuring your overall upper-body strength.
The incline/decline bench press are further bench press techniques explored below. These are great complements to the flat bench press and help to develop the upper and lower chest respectively:
Incline Bench Press (Upper Chest Focus)
- The Setup: Performed on a bench angled upward, typically between 30 and 45 degrees.
- The Benefits: This position shifts the mechanical load upward, targeting the upper chest (the clavicular head of the pectoralis major) and front shoulders (anterior deltoids). If you want to improve your vertical strength, check out our complete guide to the overhead press.
- The Reality: Incline pressing feels harder than flat pressing. Because it isolates a smaller portion of the chest and relies more heavily on the shoulders, you will generally lift lighter weights here.
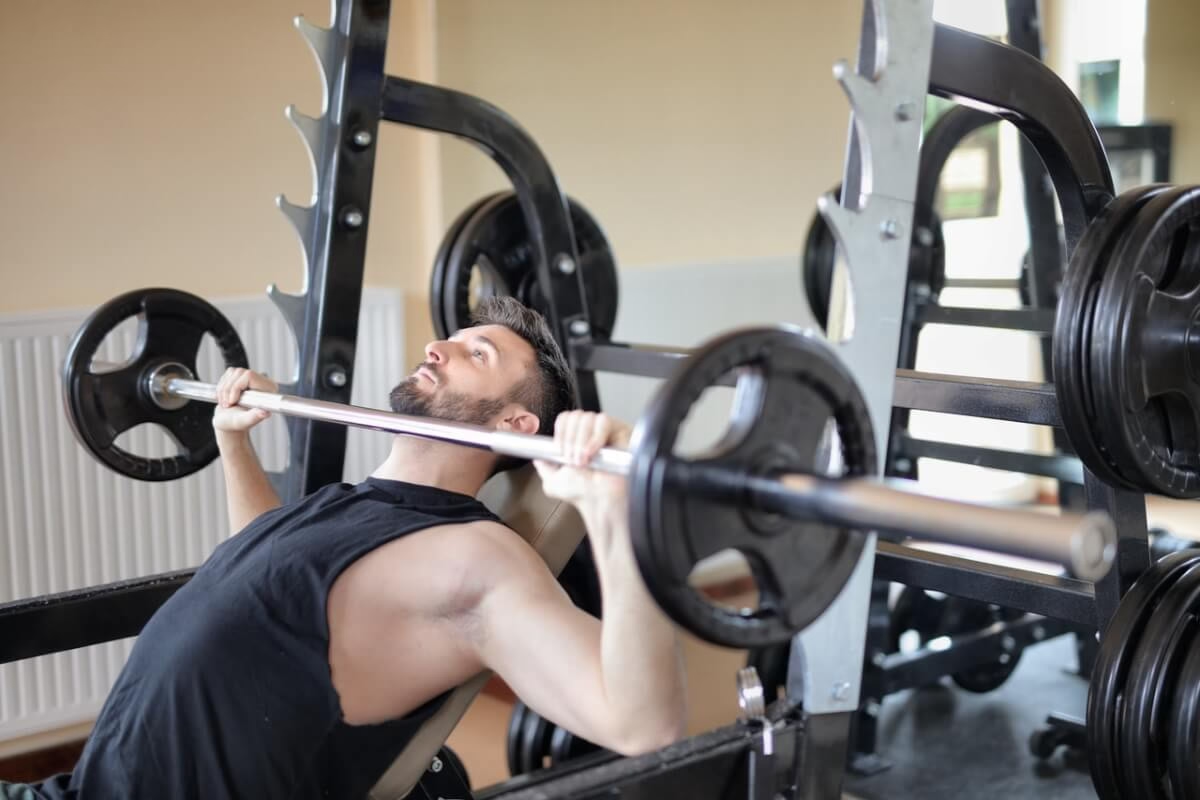
Incline Bench Press. Image sourced via Pexels.
Decline Bench Press (Lower Chest Focus)
- The Setup: Performed on a bench angled downward, with your feet securely anchored under a padded roller.
- The Benefits: This variation specifically targets the lower chest (the sternal head of the pectoralis major) while heavily reducing strain on your deep shoulder stabilisers (rotator cuff muscles).
- The Reality: Most lifters find they can actually lift heavier weights on a decline than a flat bench. The downward angle shortens the total distance the bar has to travel and puts your lower chest in a position of maximum mechanical advantage.
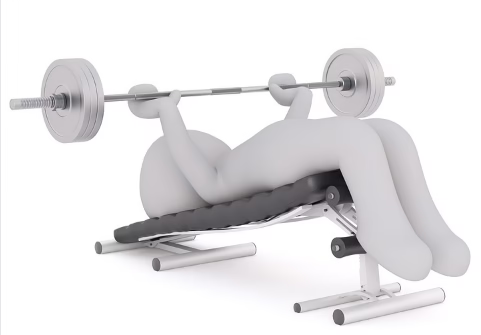
Decline Bench Press. Image sourced via Pixabay.
The Symmetry Secret: Why Your Need All Three Angles
While the flat bench is a brilliant standalone movement, incorporating incline and decline angles into your routine creates a truly complete upper body workout.
Using all these variations ensures balanced, proportional muscle development and sharp definition across the upper, middle and lower sections of your chest (pectoralis major) and your shoulders (anterior deltoids).
To achieve this without overtraining your joints, you need a sensible training strategy. Here is how elite lifters often balance it:
- The Rotation Strategy: Instead of blasting your chest from all three angles in a single workout, which can exhaust your shoulders), rotate your primary lift each week. Start with heavy flat benching in Week 1, switch your focus to the incline press in Week 2 and use the decline press for max loading in Week 3.
- The Accessory Method: If you prefer to train multiple angles in one session, always perform your flat or incline barbell press first when your energy levels are highest. Follow this with a lighter variation, such as dumbbell incline presses or machine chest presses to safely target the chest to failure.
Machine Alternatives: The Seated Chest Press
While the barbell bench press is the best option for building pushing power, the seated chest press machine is an great tool for targeted chest hypertrophy.
Because the machine stabilises the weight along a fixed track, it eliminates the need for a spotter and reduces the demands on your stabilising shoulder muscles.
This allows you to isolate your chest safely and push your pectorals to failure, making it an excellent alternative if you’re training alone, recovering from an injury or looking to push your lift to the max.
Next Steps: Perfect Your Press
Build Supporting Muscles: A massive bench press requires strong shoulders and triceps. Discover the best accessory movements to drive up your numbers in our Master Guide to Compound Lifts.
Protect Your Shoulders: Heavy pressing can take a toll on your shoulder stabilisers (rotator cuffs). Learn how to keep your joints healthy and pain-free by studying our guide on Spotting and Safety.
Best The Plateaus: If your progress has stalled, your recovery and fuel might be the missing link. Learn how to optimise your nutrition for maximum strength in our Nutrition and Fueling Guide.
💬 Share Your Thoughts: What’s Your Bench Strategy?
We want to hear about your bench press experiences. Drop a comment below to share your thoughts:
- Your Current PR: What is your current personal record or what specific weight milestone are you chasing next?
- The Setup: Do you prefer a powerlifting-style arch to maximise leverage or do you prefer to keep your back flatter on the bench?
- Sticking Points: Where do you usually fail a heavy rep? Right off your chest or halfway up during the lockout?
- Favorite Bench Variation: Do you stick strictly to the classic flat barbell bench or do you prefer variations like dumbbells or incline press to build your upper body?
- Best Breakthrough Advice: For the experienced lifters, what is the #1 tip or accessory exercise that helped you smash through a plateau? For beginners, what is the biggest challenge you are facing with your form?
- The Spotter Dilemma: Do you only hunt for heavy PRs when you have a trusted spotter or do you rely on the “roll of shame” and safety arms when training alone?





Thanks , I’ve seen all the bench positions used but really couldn’t find out why or which to use. everybody seemed to have a different take on ’em.
Thanks Roger, hope the page helped clarify the benefits of the different types of bench press. You might also find the page about bench press grip and bench press technique useful.