Overhead Press
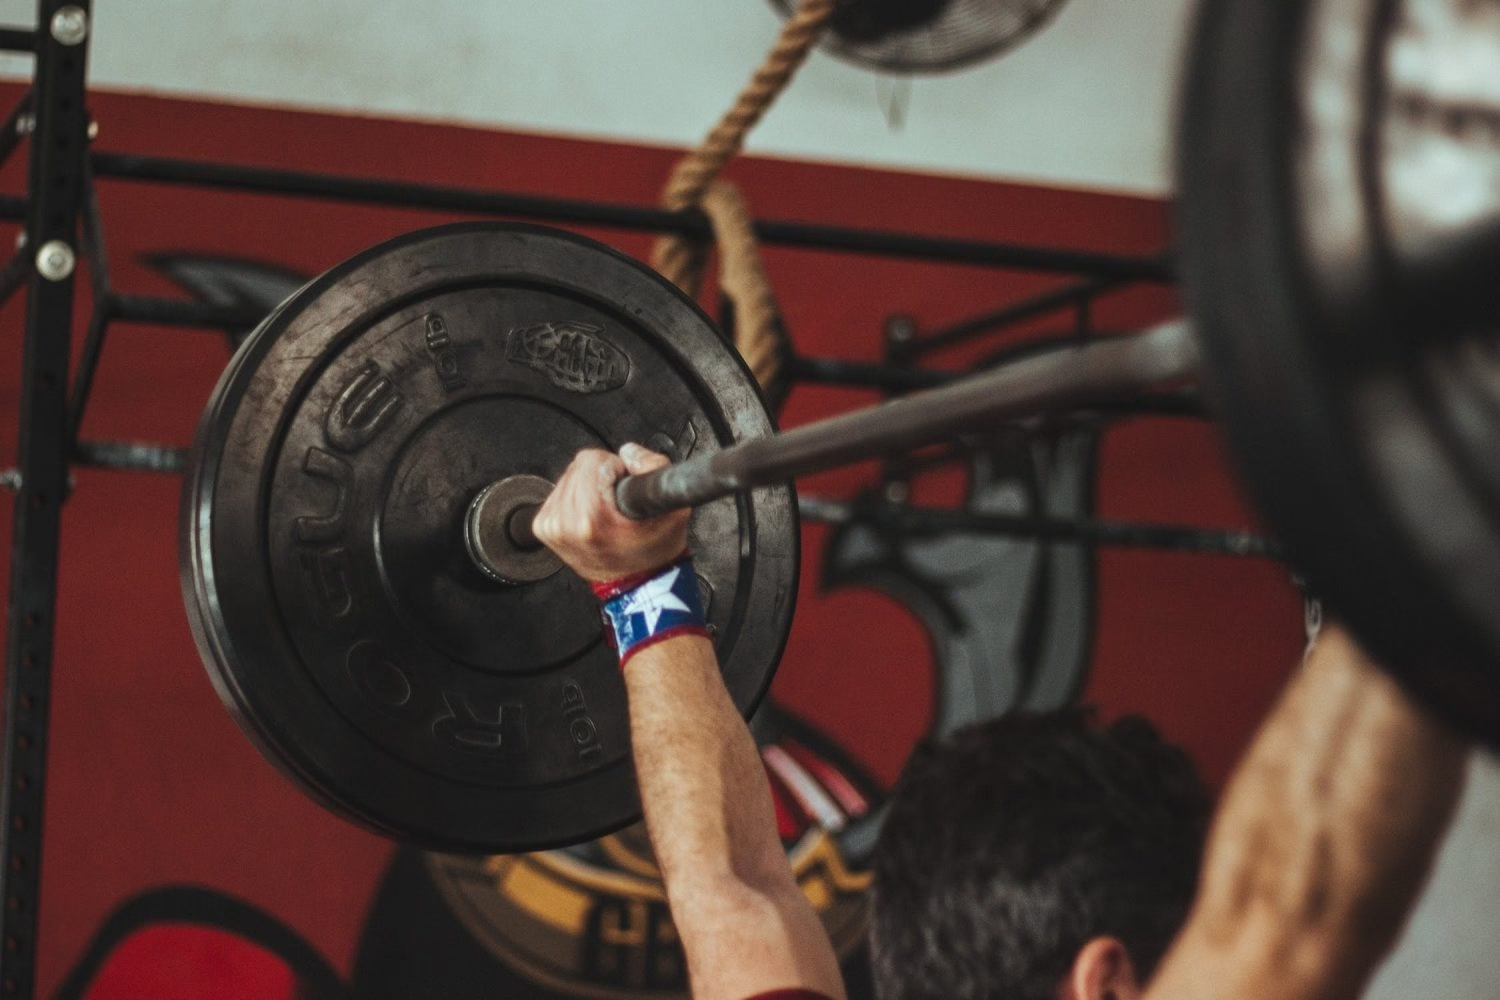
The overhead press is the ultimate test of upper-body vertical power and a cornerstone of functional strength.
While horizontal lifts like the bench press often steal the gym spotlight, a properly executed overhead press requires your entire body to work as a single cohesive unit.
By shifting your focus from the isolated tracks of gym machines to the dynamic stability of free weights, you can develop strong shoulder health, core resilience and real-world strength.
Header image: Pexels
What is the Overhead Press?
The overhead press (often referred to as the strict press or military press) is a multi-joint vertical pressing movement. The lifter needs to push the weight up from the front of the shoulders (anterior deltoids) to above the head until the arms are straight with complete elbow extension.
While gym culture frequently classifies the overhead press purely as a shoulder exercise, modern sports science recognises it as a total-body compound lift.
The overhead press can be performed as a free weight exercise with a barbell or dumbbells or by using a shoulder press machine.
Unlike machine alternatives that isolate a single plane of motion, a free-weight overhead press forces the entire nervous system and skeletal structure to coordinate, making it a highly efficient developer of functional power.
Which Muscles Does the Overhead Press Work?
The overhead press requires a coordinated effort across primary and stabilising muscles. It mainly uses the shoulders (deltoids), upper back (trapezius) and triceps.
For a further breakdown of the exact muscles used in the overhead press:
- Anterior and Lateral Deltoids: The primary drivers responsible for shoulder flexion and abduction.
- Triceps Brachii: The primary means of elbow extension, especially during the lockout.
- Upper Trapezius and Serratus Anterior: These muscles enable upward rotation of the shoulder blades (scapula) as the arms go overhead.
- The Dynamic Core (Abdominals & Erector Spinae): Your midsection undergoes isometric contraction to protect the spine from hyperextension.
- Lower Body Stabilisers (Glutes & Quadriceps): Your legs and hips anchor your stance.
The overhead press also bring legs into play to stabilise the movement, along with the abdominals and back – these all work as synergist muscles. As you can see, this is an all-over body powerhouse of a lift.
The Fourth Big Lift
Within the powerlifting community, the overhead press is often considered the ‘fourth big lift’. It stands as a vital strength metric, alongside the sport’s classic trio (Squat, Bench Press and Deadlift).
The Missing Dynamic Vector
The three powerlifting movements favour the lower body and horizontal pushing power. The overhead press fills the gap by testing vertical pushing power. Without it, an athlete’s upper-body development lacks balance and perfect real-world function.
The Ultimate Core Tester
Many athletes are surprised to learn that a heavy overhead press requires intense, full-body stabilisation. When completing this lift, you’re standing upright and pushing a load away from your centre of gravity.
This means your core, glutes and upper back need to work under strong isometric tension to prevent you from toppling over or hyperextending your spine. It’s in effect, like performing a standing plank under heavy load.
A Historic Legacy
Before powerlifting standardised the ‘Big Three’ in the mid-20th century, the overhead press was actually part of the Olympic Weightlifting clean and press programme.
For decades, it was considered the definitive global standard for measuring pure, unadulterated human upper-body strength.
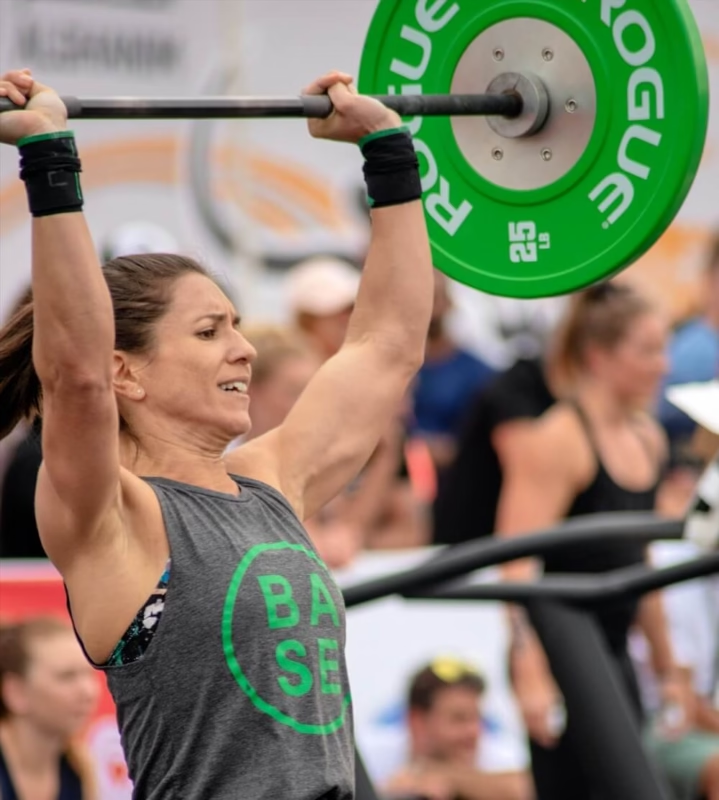
Image sourced via Pexels.
The Dramatic History of the Clean and Press
Before the bench press became the undisputed king of the gym, the overhead press was the accepted measure of human raw upper-body power.
For the first seven decades of the 20th century, it reigned supreme as part of Olympic Weightlifting’s ‘Olympic Triathlon’ (which consisted of the Clean and Press, the Clean and Jerk, and the Snatch).
However, its history is deeply controversial and serves as a vital lesson in human biomechanics:
The Original Standard
In the early days, the overhead press was a movement of vertical isolation. Lifters had to stand upright with an rigid spine. Any noticeable backward lean or knee bend resulted in an immediate red light from the judges.
The Rise of the ‘Olympic Layback’
As athletes pushed the boundaries of strength to win medals, they discovered a loophole. By arching their lower backs and leaning their torsos backward, they could shift the angle of the press.
This move effectively turned a vertical overhead press into a standing incline bench press, allowing them to use their powerful lower pectoral (chest) muscles to lift heavier weights.
The Judging Nightmare
Because the lifting movement happened so quickly, it became physically impossible for referees to judge fairly. Distinguishing between a legal, minor torso tilt and an illegal hyperextension of the spine caused constant arguments on the world stage.
The 1972 Olympic Ban
To protect the safety of the athletes’ lumbar spines and restore competitive integrity, a historic motion was passed. As detailed in the official International Weightlifting Federation (IWF) historical review, the clean and press was permanently removed from official weightlifting competitions, following the 1972 Munich Olympic Games.
When the press fell out of the Olympics, it vanished from mainstream gym culture, allowing the bench press to take over the spotlight.
By understanding this history, modern lifters can see exactly why abdominal bracing and a neutral spine are emphasised so heavily today. It’s the only way to reap the benefits of the lift without risking severe injury to your back.
Benefits of the Overhead Press
While popular movements like the bench press are great for building the chest, the overhead press is the ultimate tool for developing true, functional power from head to toe.
1. Builds Shoulder Size and Strength
If you want capped, powerful shoulders, this is the perfect exercise. Unlike isolation lifts, such as lateral raises, the compound nature of the overhead press allows you to lift much heavier weights.
This puts your deltoids under maximum tension, especially the anterior and lateral heads, while also developing the upper traps and triceps.
As one of the fundamental compound lifts, the overhead press builds overall pressing power that carries over to other exercises like the bench press and pull-ups.
2. Muscular Balance and Shoulder Joint Protection
Modern desk-bound lifestyles can create a slouched posture. The overhead press combats this imbalance. It also helps to counteract chest-dominant training, such as overworking the bench press in the gym, ensuring your shoulders develop evenly.
To lock a heavy weight safely above your head, your upper trapezius, rhomboids and serratus anterior have to work together to rotate and stabilise the shoulder blades.
By strengthening the stabilising muscles in the shoulders and upper back, the shoulder press makes joints more resilient, helping to build a resilient rotator cuff and a healthy range of motion. This all protects against impingement injuries.
3. Acts as a Standing Core Workout
The overhead press isn’t just about pressing weight upward. To perform it safely, you must maintain a strong, upright posture. This requires your core, obliques and spinal erectors to work continuously to stabilise your spine.
In fact, the overhead press is secretly one of the best abdominal exercises in the gym. Because you are pushing a heavy load completely away from your centre of gravity, your midsection can never relax.
Your abdominals, obliques and lower back are working constantly in a rigid isometric brace to keep your spine straight and stable. Over time, this stabilisation leads to improved daily posture, less slouching and a powerful, supportive core.
To build the trunk stability required for a heavy overhead press, you can balance your routine with dynamic abdominal exercises to build muscle thickness, alongside static core stabilisation movements to protect your spine.
4. Improves Total Body Coordination
The overhead press trains your entire kinetic chain, teaching your body to function as a single, cohesive unit.
The energy required to move the barbell travels all the way from your feet flat on the floor, up through your legs, across a braced core and out through your arms. Mastering this force transfer is highly functional and translates to improved performance in sports and daily life.
- Natural Partner Lift
The overhead press is an excellent exercise to combine with the lat pulldown, which works in a similar yet opposite way. The lat pulldown requires the lifter to pull the weight down vertically in front of the chest, instead of pressing it straight up from the shoulders.
Because they are exact opposites, these two movements work perfectly together to build structural balance, prevent injury, and develop a fantastic V-shaped upper body physique.
5. Strengthens Bones and Joints
Placing a weight vertically down through the skeleton (called “axial loading”) is one of the most effective ways to trigger osteogenesis (the creation of new bone tissue).
Over time, this consistent overhead loading increases bone density and strengthens your connective tissues, protecting your skeleton and keeping your joints healthy as you age.
Ultimately, the overhead press is far more than just a show of upper body strength. It’s a true full-body compound lift that builds powerful, capped delts, strengthens your core and reinforces total-body stability.
6. Improves Functional Strength
One of the biggest advantages of the overhead press is its transfer to real-life movements. Anytime you lift something overhead (e.g. placing luggage in an overhead compartment, stacking boxes or pushing something heavy above shoulder height) you’re relying on the same muscle groups trained by this exercise.
Unlike isolation exercises, the overhead press reinforces compound strength, meaning it trains multiple joints and muscles working together. This improves not only your physique but also your coordination and athletic ability, especially in activities involving pushing or throwing.
Image sourced via Pexels
Overhead Press Technique
A powerful, injury-free overhead press relies on two non-negotiable factors: optimal body positioning and a precise vertical bar path. Without mastering these foundational mechanics, you limit your high-load capacity and risk stalling your long-term gains.
While you can build vertical pressing power using a variety of gym equipment, training with a free-weight barbell offers the ultimate test of full-body integration. Let’s break down exactly how to set up, execute and progress this lift safely:
1. The Setup: Stance and Grip
Before the barbell even leaves the rack, you must establish a strong base. A weak setup can make the weight feel heavier than it actually is.
- Stance and Ground Anchoring: Stand with your feet set at shoulder-width apart. Distribute your body weight evenly across your mid-foot and heels. Contract your quads and glutes to lock your pelvis into a neutral position, creating a rigid column.
- The Rack and Grip: Set the barbell in a power rack at roughly mid-chest height. Grip the bar just outside shoulder-width apart using a full overhand (pronated) grip, ensuring your palms face forward. Rest the bar deep in your palm, stacked over your forearms to protect your wrists from bending backward.
- The Elbow Shelf: Position your elbows forward so they sit slightly in front of the barbell. Your forearms should be perfectly vertical and perpendicular to the floor. Push your chest up and out to engage the upper back muscles, creating a muscular shelf across your front shoulders to support the load.
- Neck Alignment: Keep your head neutral and fix your eyes straight ahead. Avoid the instinct to look up at the ceiling, as tilting the neck backward causes cervical strain and impairs your balance.
2. Step-by-Step Execution
Once you’re sure of your setup, the lift should be performed in one smooth, controlled sequence.
The Core Isometric Brace
Before starting, take a deep breath into your abdomen and brace your core, as if preparing to take a punch to the stomach. Maintaining this internal pressure stabilises your spine and prevents your lower back from arching under the load.
The Straight Ascent
Exhale steadily as you press the bar straight upward. The strongest, safest bar path is a straight line tracking directly over the middle of your foot. Allowing the barbell to shift forward places pressure on your shoulder joints and wastes pressing energy.
To clear a safe pathway for the bar on the say up, without leaning back and straining your spine, quickly and smoothly tilt your head slightly backward just until the bar passes your face.
The Lockout and Torso Shift
The moment the barbell clears the top of your skull, immediately push your head forward through the “window” of your arms to bring your spine back into perfect alignment. At the top of the ascent, fully extend your elbows, tighten your traps and squeeze your shoulders to lock out the weight.
The Controlled Descent
During the eccentric phase, inhale deeply as you lower the barbell under full control back down to the front rack position, letting it settle just below chin level. Never drop the bar quickly or rely on gravity.
Aim for a strict, steady tempo, which should be approximately two seconds up and two to three seconds down. This controlled negative phase enhances your neuromuscular control and protects the joints from injury.
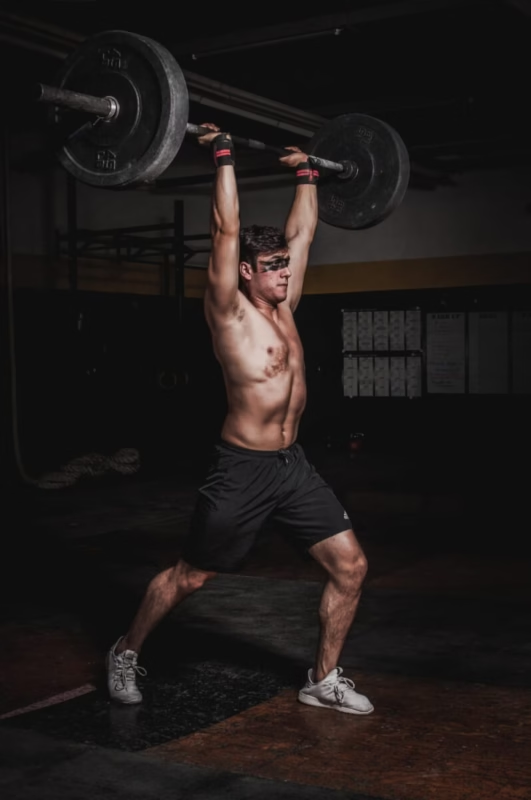
Split-Leg Stance. Image sourced via Pexels.
3. Seated Lifts, Dumbbells and Kettlebells
Once you’ve mastered the standard barbell press, you can use alternative tools to target your shoulders through different mechanical pathways:
Seated vs. Standing Dynamics
The standing barbell press is great for a total-body workout. However, the seated variation is also effective for targeted muscle hypertrophy. By removing the lower body from the movement, you can isolate the shoulders.
Once seated, keep your feet flat on the floor with your lower back pinned into the pad. Avoid leaning backward, which can accidentally transform the lift into an incline bench press.
Dumbbell Press Mechanics
Pressing with dumbbells forces each arm to move independently, making it the perfect tool for exposing and fixing side-to-side muscle imbalances.
Hold the dumbbells at your shoulders with your palms facing forward or turned slightly inward (a neutral grip) to protect the joints. Ensure both arms drive upward evenly at the same time.
Kettlebell Overhead Pressing
Kettlebell pressing introduces a unique stabilisation challenge. Hold the kettlebell against your forearm in a secure rack position. Keep your wrists neutral and straight, preventing the offset weight of the bell from pulling your wrists backward.
Because dumbbells and kettlebells move freely in three-dimensional space, they require much higher joint stabilisation than a barbell. Always scale down to lighter weights when learning the movement patterns for these variations.
4. Training Safety and Progression Rules
To keep your joints resilient, there are a few training habits to take on board:
Technique First
Always prioritise developing good form before adding weight to the bar. A frequent mistake is chasing heavy loads (often called ‘ego lifting’) before mastering basic movement patterns.
Build your vertical strength systematically by adding small weight increments over time.
If you ever feel your posture wobbling or your reps turning messy, reduce the weight on the bar and focus on clean, controlled technique.
The Danger of Bouncing and Impingement
Good overhead press technique means moving smoothly without bouncing the bar off your chest at the bottom of a rep. Bouncing uses momentum to cheat the lift and risks injuring your collarbones.
Control your range of motion: lowering the bar too far below the collarbones under heavy loads can trap soft tissues within the shoulder joint, leading to shoulder impingement injuries.
Conversely, cutting the movement short into half-reps robs you of the full benefits of the exercise. Aim for a clean, full range of motion on every single rep.
Advanced Variations: The Bradford Press
If you choose to incorporate advanced training variations like the Bradford Press (where the barbell is moved slowly back and forth over the head from the front rack to the back of the neck) you must use an extra controlled movements.
Keep a strong grip on the bar and your head completely still. Rely exclusively on the shoulders and elbows to steer the load. Avoid this variation entirely if you have a history of shoulder pain or limited joint mobility.
5. Common Overhead Press Errors to Avoid
- Forgetting the Rack Reset: Neglecting to reposition your elbows forward and drive your chest out at the start of every single repetition. Be careful not to flare your elbows during the lift.
- Failing to Get Under the Bar: Keeping your head and torso pushed too far backward at the top of the lift instead of shifting your head forward under the bar to lock the weight over your midline.
- Leaning and Lumbar Arching: Arching your lower back to force a heavy weight upward, which destroys your core stability and places dangerous shear stress on your lower spine.
- Rushing the Negative: Dropping the weight rapidly from the lockout phase, which wastes the muscle-building benefits of the eccentric contraction and risks joint strain.
- Overbalancing and Angled Pressing: Tilting your neck or leaning your torso back too far, which causes you to press the barbell at an awkward angle and increases the risk of falling over. Keep your eyes forward and your body straight.
Learning proper technique and building up gradually are key to safe, long-term shoulder press training.
Keep your movements clean and controlled and don’t be afraid to scale the lift to your level to ensure proper form and steady progression.
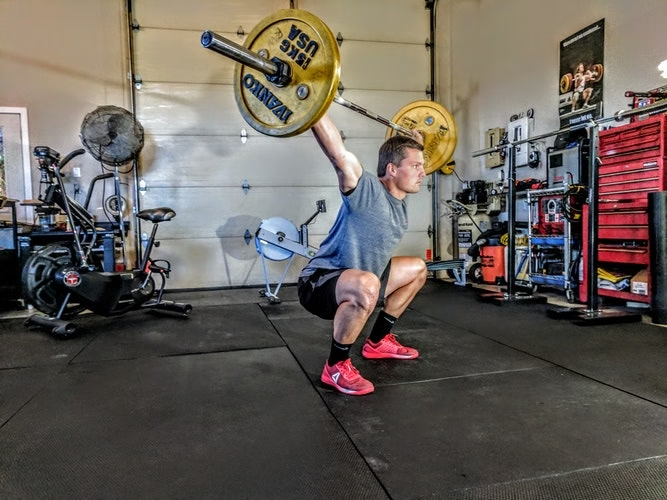
Squat Jerk. Image sourced via Unsplash.
The Vertical Press: Variations & Types
The overhead press is a highly versatile movement pattern. Depending on your training goals, competitive discipline or equipment availability, you can alter the mechanics of the lift to shift muscle recruitment.
Some variations use a lower-body power transfer to lift maximum weight, while other strict styles isolate the upper body completely.
Whatever your goals, whether it’s functional power, muscle hypertrophy or building strong joint health, exploring these variations will keep your routine balanced and effective.
You can train the overhead press with various gym equipment:
Barbells – ideal for building strength and power.
Dumbbells – allows for a greater range of motion and helps correct muscle imbalances.
Kettlebells – challenges grip strength and shoulder stability.
Machines – provides support and consistency, great for beginners or those recovering from injury.
1. Free-Weight Foundations
The Barbell Overhead Press
The standard lift
The standard barbell overhead press, performed either standing or seated, is the benchmark of vertical pressing strength.
Because a loaded barbell moves freely in three-dimensional space, it strips away any artificial assistance. This challenges your dynamic stabilisers, upper back and midsection to work together to keep your body balanced throughout the entire lift.
The Dumbbell Overhead Press
Pressing dumbbells forces each arm to operate independently, making it a useful tool for identifying and correcting side-to-side muscle imbalances.
Dumbbells offer a slightly more customisable path of motion than a barbell, which can be gentler on the shoulder joints. Because you must balance two separate weights simultaneously, this variation recruits the stabilisers around the shoulder joint and core.
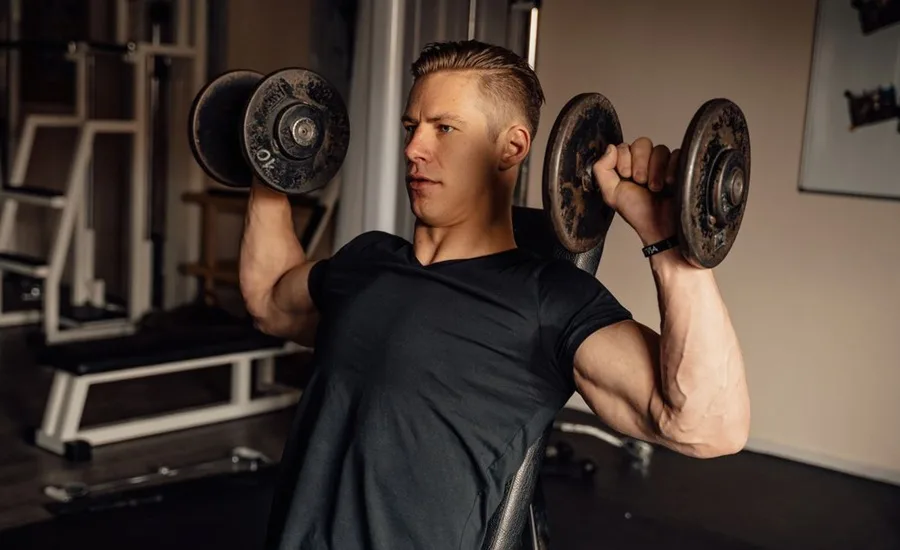
Dumbbell Overhead Press. Image sourced via Pexels
The Kettlebell Overhead Press
The kettlebell press is executed with the weight resting against the back of your forearm in the “front rack” position. Because a kettlebell’s centre of mass is offset, it pulls your arm outward, forcing your wrist, forearm and shoulder stabilisers to exert counter tension.
This can be performed as a unilateral (single-arm) lift or a bilateral movement, and it is unmatched for building grip strength and joint stability.
The Arnold Press
Popularised by bodybuilding legend Arnold Schwarzenegger, this variation introduces a smooth, rotational component to the standard dumbbell press.
You begin the lift at chest height with your palms facing your torso. As you drive the weights upward, you rotate your wrists so your palms face forward at the top of the lift. This continuous rotation keeps the deltoid under tension through a full, extended range of motion.
2. Strict Strength vs. Ballistic Power Lifts
The Military Press
The military press is a standing barbell press performed with strict form. In a traditional military stance, your heels are pinned together. This narrow footprint drastically reduces your base of support and removes any stabilisation help from your lower body, forcing your arms, shoulders and upper back to manage the weight.
Because the military press is a pure test of upper-body power, you will usually need to use a lighter weight here than in other standing press variations.
The Viking Press
The Strongman Standard
It is a common gym myth that all standing overhead presses require purely upper-body effort. While using leg drive in a formal, traditional military press historically resulted in an automatic disqualification, modern World’s Strongest Man and Giants Live competitions feature different rules for the huge apparatus known as the Viking Press.
The mechanics of this lift are unique: the pivot point of the implement sits far behind the athlete, with long parallel handles resting directly over the front of the shoulders.
Unlike a strict press, athletes are fully permitted to use leg drive to launch the massive weight stack. By performing a sharp knee dip and an explosive hip extension, competitors use a heavy push press mechanic to propel the handles upward.
What makes this lift so harsh is the strict “no double-dipping” rule. Once the initial leg drive is spent, athletes can’t drop a second time to catch the weight. Their lower bodies must remain locked out, forcing the shoulders and triceps to absorb the weight.
The Push Press
The push press is a standing variation that introduces a powerful, explosive leg drive. By performing a quick, controlled knee dip and driving upward through your heels, you generate a wave of kinetic energy from the floor that launches the barbell off your shoulders.
This leg drive allows you to bypass the hardest part of the lift, enabling you to handle heavier weight than a strict press while building full-body power.
The Clean and Press
This classic strength discipline pairs a vertical pull with a vertical push. The movement starts with a deadlift movement to bring the bar upwards using a powerful leg drive and an extension of your hips and knees.
You then need to quickly pull your body underneath the loaded barbell to catch it smoothly on the front rack of your shoulders.
From this solid base, you then push the bar overhead using only upper body power. This press is done strictly, with no leg drive and no dip-and-push.
The clean and press requires deep total-body coordination and engages virtually every major muscle group in the body.
The Olympic Jerk
The jerk is an explosive, highly technical weightlifting movement used to move maximum loads overhead. Unlike the push press, where your arms actively press the bar up to complete the lift, the jerk relies on speed.
You use a powerful leg drive to launch the bar, and then immediately drop your body underneath the barbell, catching it with locked elbows.
Depending on how a lifter catches the weight, they will drop into one of two primary stances:
- The Split Jerk: The lifter catches the barbell in a staggered, split-legged stance with one foot forward and the other back. This creates a highly stable stance, allowing the lifter to adjust their centre of gravity forward, backward or downward to secure the catch.
- The Push Jerk (or Power Jerk): If a lifter chooses not to split their legs, they can drop straight down, catching the barbell with feet parallel and shoulder-width apart. If they catch the bar with their knees only partially bent, it is a power jerk. If they catch it in a deep squat position, it is a squat jerk. Both styles require excellent timing and mobility, as the lifter must secure the overhead lockout instantly before standing upright to complete the lift.
The Olympic Jerk is an advanced speed lift that is best practised under professional coaching.
3. Machine Overhead Press Alternatives
The Seated Machine Shoulder Press
The selectorised machine press provides a highly secure, structured alternative to free weights.
While the standing barbell overhead press is the ultimate test of full-body coordination and vertical power, the seated machine shoulder press is an exceptional variation for packing size onto your shoulders.
By seating you securely against a back pad and guiding the weight along a fixed track, the machine completely removes the need for core stabilisation and lower-back bracing.
This lets you isolate the front deltoids and triceps with precision, allowing you to train without worrying about losing your balance or straining your spine.
This advantage is ideal for beginners building lifting confidence, lifters navigating joint rehabilitation or advanced athletes looking to isolate and drive their deltoids to failure.
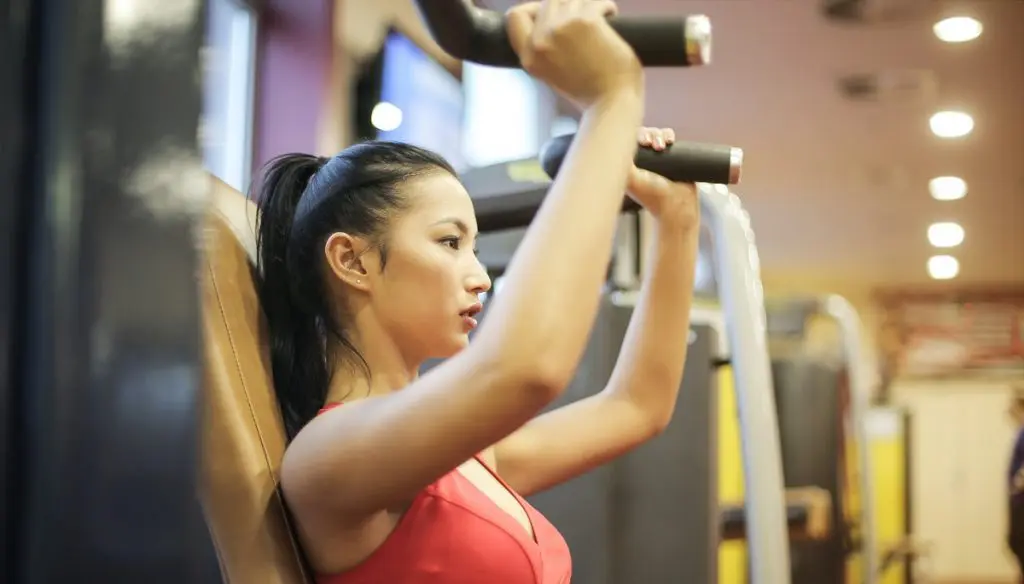
Shoulder Press Machine. Image sourced via Pexels
4. Specialised Variation Spotlight
Bradford Press
The Bradford Press is a free-weight variation of the overhead press named after Jim Bradford, a legendary American Olympic weightlifter of the 1950s and 1960s who used it to build his world-class press.
The movement starts in a front rack position across the front of the shoulders (anterior deltoids). Unlike a traditional overhead press, the goal is not to lock out the weight overhead. Instead, you press the bar just high enough to clear the crown of your head, then pivot your shoulders and elbows backward to lower it behind your neck.
To perform this safely, keep your head completely still and ensure your forearms remain perpendicular to the floor throughout the movement. The rotational movement should be centered entirely in the shoulder joints.
By avoiding a full lockout at the top, this variation keeps the front, side and rear deltoids under continuous muscular tension.
One repetition is completed only after the bar travels over the head to the back and then returns safely to the front again.
Because the bar moves back and forth over your head during the Bradford press, this type of press has an inherent risk of joint strain. Always use a strong grip and a slow and deliberate motion throughout the lift.
Overhead Press Safety & Injury Prevention
The overhead press is one of the great strength-building lifts, but it also places more stress on the joints than many other exercises. Pressing weight overhead makes unique structural demand on your body.
The movement requires coordination between the shoulders, arms, core and spine. Any weak link in the chain can increase your risk of injury. The shoulder joint is one of the most mobile in the body, but this wide range of motion comes at the cost of stability.
The rotator cuff, deltoids, traps and triceps must work together while the core and spine keep the body stable. If form breaks down, the lower back may take the strain, or the shoulder may be pushed into vulnerable positions.
The risks associated with the overhead press can be managed with proper preparation and controlled technique.
1. Joint Risks & The RAMP Preparation Protocol
Skipping straight to your heavy working sets without preparation is the easiest way to cause acute muscle tears or chronic joint inflammation. The most frequent injuries associated with reckless vertical pressing include:
- Shoulder impingement and bursitis caused by pressing behind the neck or flaring the elbows out to a 90-degree angle.
- Rotator cuff strains resulting from uncontrolled, ballistic movement patterns.
- Lumbar spine strains caused by excessively arching the lower back to force a weight up.
- Wrist and forearm strain resulting from poor grip alignment across the fingers.
To manage these risks, always perform a thorough sports-specific pre-workout routine using targeted movements from our Pre-Workout Stretches Guide.
A pre-workout routine for weightlifting should include light cardio pulse raisers, dynamic stretches and mobility exercises targeting the thoracic spine and glenohumeral joint.
This warm-up session should be built around the scientifically backed RAMP protocol (Raise, Activate, Mobilise, Potentiate), which always includes completing a series of progressive warm-up sets using an empty barbell or light dumbbells before adding heavy working plates.
Review our master Warm-Up Guide for a deeper dive into planning your pre-workout sessions.
2. Setting Up Your Safe Training Environment
Protecting your body requires control over your immediate gym space:
- Clear Your Workspace: Ensure the floor space around your perimeter is completely clear of stray plates or dumbbells, giving you an open area to safely ditch the weight if a rep fails.
- Rack Positioning: Set the J-cups in a power rack so the barbell rests at mid-chest height. Avoid setting the bar too high, which forces you to awkwardly extend onto your toes just to un-rack the load.
- Use Mechanical Safeguards: If you are testing your physical limits or performing intense strength sets alone, use a power rack equipped with adjustable safety pins. If possible, use a spotting cue system with a training partner to lift heavy safely.
- Anchor Your Footwear: Wear flat, hard-soled shoes to provide a stable platform. Avoid running trainers with thick, spongy air cushions, as these create an unstable base.
3. Anatomy Protection: Protecting Spine & Rotator Cuff
Your structural core and shoulder need targeted movement patterns to maintain long-term joint health.
Spine and Midsection
When the weight gets heavy, lifters naturally try to lean back to finish the rep, which places pressure on the lower back. To eliminate this issue, prioritise these mechanics:
- Brace your core before every rep to create solid internal core support that protects the spine.
- Squeeze your glutes to stabilise your pelvis and lock your lower back out of extension.
- Keep your ribs down, stacked over your hips. If your lower chest pushes upward, your spine is overarching.
- Know When to Sit: If you experience lower back discomfort during standing presses, substitute the lift with a seated chest press to support your spine while you build up your core stability.
Shoulder Health
The stabilising muscles of the rotator cuff must be protected from internal joint pinching and wear and tear. Keep the shoulder joints centered and healthy by building these habits into your training routine:
- Add Simple Accessory Work: Include quick movements like banded external rotations in your warm-ups to strengthen the deep stabilising muscles.
- Maintain a 1:1 Push-to-Pull Balance: To prevent slouched, forward-rolling shoulders, balance every vertical pressing workout with equal pulling movements like single-arm rows, face pulls and lat pulldowns.
- Banish Behind-the-Neck Pressing: Avoid forcing your shoulder joints into awkward, unnatural angles. Always press exclusively from the front of your chest (the front rack position).
- Listen to Your Body: If you feel a pinching pain or clicking inside the shoulder socket, stop immediately. Pushing through joint pain can accelerate tissue damage.
- Train the Deltoids Evenly: Keep your shoulders balanced with front, side and rear raises to target all 3 parts of the deltoid muscles. You should also build up your upper back to support the entire shoulder structure.
- Keep Moving Freely: Dedicate time to regular upper back and shoulder mobility work, making sure to mix vertical presses with pulling movements and horizontal pressing to keep your strength balanced.
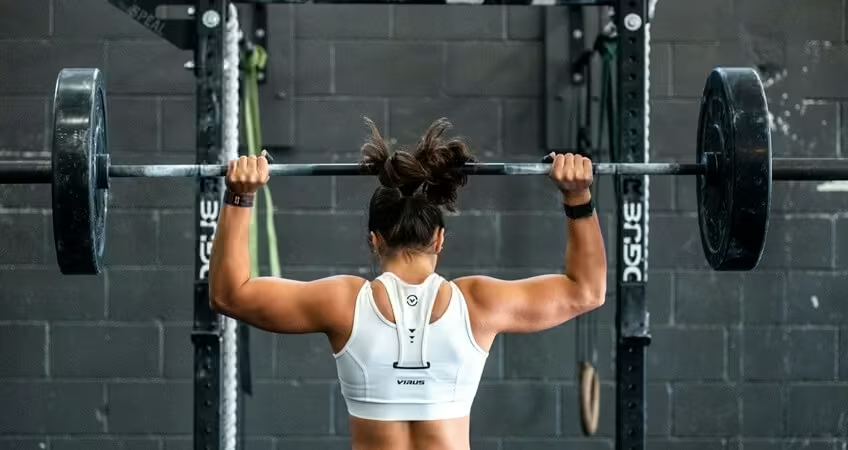
Image sourced via Unsplash.
4. Safety Across Press Variations
Every style of overhead press alters the demands on your joints. Adjust your technique based on the style of press:
- The Dumbbell Overhead Press: Keep full control as you guide the weights into position. When a set is finished, safely lower the dumbbells back to your outer thighs. Never drop heavy dumbbells from the overhead position, as they can bounce unpredictably on the gym floor.
- The Kettlebell Press: Keep the bell tucked securely against your forearm in the rack position. Keep your wrists straight and rigid; letting the offset load pull your wrist backward causes wrist strain.
- The Arnold Press: Rotate your wrists smoothly and under control as you push upward. Avoid using heavy weights that place excessive twisting stress on the deep tendons.
- The Strict Military Press: Keep the bar moving upward with zero momentum. Don’t lean your upper body back to cheat the barbell past your face.
- The Push Press: Use a controlled, shallow knee dip to generate a sharp, powerful leg drive. Avoid turning the movement into a deep squat, which can misalign the hips and overload the lower back.
- The Clean and Press: Master the mechanics of the clean on its own before combining the two lifts. Keep the bar path tracking close to your torso during the transition to protect the wrists and shoulders from a sudden difficult catch.
- The Olympic Jerk: A fast, advanced movement that demands high-level technique. Practise with light weights until you can consistently catch the weight in a perfectly balanced split or partial squat stance.
- The Seated Machine Shoulder Press: Adjust the seat height so the handles line up perfectly with the tops of your shoulders. Keep your lower back pinned firmly into the back pad and avoid lifting too heavy, which forces the joints into an unnatural path.
- The Bradford Press: Because this advanced lift requires repeatedly moving the bar over the head to the back of the neck, only use very light loads. Fatigue raises the risk of accidentally clipping your skull or straining your neck.
5. Long-Term Progression & Recovery
True training safety extends long past your final working set. To build sustainable muscle mass and protect your skeleton over decades of lifting, optimise your recovery habits outside the gym:
- The Form-First Rule: Progress gradually by adding small weight increments over time. Don’t prioritise heavy weights over perfect movement patterns.
- Strategic De-loading: Every 4 to 6 weeks, reduce your training volume or load by 20-30% for one week to give your shoulder joints and connective tissues time to repair.
- The 48-Hour Recovery Window: Heavy overhead pressing strains the central nervous system. Avoid training the shoulders on consecutive days. Give your deltoids at least 48 hours of rest between workouts.
- Deltoid Symmetry: Ensure a balanced physique by working all three areas of the deltoid evenly. Pair your front-dominant compound pressing with isolated work for the side and rear deltoids, such as lateral raises and rear-delt flyes to build proportional strength.
Pick Your Progression
Isolate for Hypertrophy: Once your heavy, multi-joint pressing is complete, target individual muscle groups to spark maximum growth. Learn how to safely fatigue your deltoids and triceps with our comprehensive Guide to Isolation Lifts.
Balance Your Pressing: Heavy vertical pushing requires equal and opposite pulling power to preserve shoulder mechanics. Build upper back symmetry using our guide to Chin Ups and Pull Ups, or use our structured guide to Assisted Pull-Ups if you are still building the foundational strength needed to handle your full bodyweight.
Beat the Plateaus: If your overhead progress has stalled, your baseline cellular recovery, sleep quality and muscle fueling cycles might need an upgrade. Learn how to optimise your lifestyle for max pressing power in our Nutrition and Fueling and Sleep and Recovery guides.
What’s Your Overhead Strategy?
We want to hear about your experiences training the vertical press. Drop a comment below to share your thoughts:
- Your Current PR: What is your current overhead press personal record or what specific weight milestone are you gunning for next?
- The Gym Floor Split: Do you prefer the total-body challenge of a standing free-weight press, or do you use a seated machine shoulder press to safely push your deltoids to complete failure?
- Spine Protection Habits: When the weight gets heavy on standing variations, do you rely entirely on deep abdominal bracing or do you click on a lifting belt for lower-back support?
- Advanced Variations: Have you ever experimented with advanced barbell variations like the Bradford Press or do you prefer the heavy dynamic loading of the Push Press?
- Form Breakthroughs: What is the single best piece of technical form advice you’ve received that improved your lockout stability or cleared up shoulder discomfort?




Leave a Reply